
Make Geo Heart Wall Art with Cricut Explore Air 2!
This is a sponsored conversation written by me on behalf of Cricut. The opinions and text are all mine.
A lot of what I cut on my Cricut Explore Air 2 is cardstock for my scrapbooking projects. But there are so many other materials that it can cut, and it's fun to play with those - and often exciting to see what the machine can do, with the right blade, mat and setting. When I was working Scrapbook Expo shows for Cricut, we had a keychain in the booth with samples of material that had been cut on the Explore machine. It was downright amazing to see some of them, such as leather, craft wood, and acrylic. I've actually cut acrylic on my own machine - I just had to try it after seeing that key chain! I've also cut fabric (with an iron-on stabilizer backing), and wood veneer paper. Cricut advertises that the Cricut Explore Air 2 will cut over 100 materials...I'm not even sure that I could name 100 materials to try to cut! Perhaps instead of asking "what can I cut with my Cricut?" we should ask - "what can't I cut with my Cricut?"
Projects like this Geo Heart Wall Art are so fun because it gives me a chance to play with a couple of different materials, in this case Holographic Vinyl and Glitter Cardstock, neither of which I had worked with before. It's always exciting to see what my machine can do with a new material!

Cricut Geo Heart Wall Canvas
Supplies Needed:
Green Acrylic Paint
White Acrylic Paint
The Crafter's Workshop "Mini Tile Mania" stencil
Buttons
12" x 12" canvas
Not on the supply list, but an important tool to completing this project, is the Cricut Essential Tool Set. Over the course of completing this project, I used virtually every tool in this kit: the trimmer, scissors, scraper, spatula, and weeding tool. I even used the scoring tool, despite there being no scoring on this project, because it is the perfect size and so smooth for rolling flower petals on!
And bonus - it perfectly matches my Mint Cricut Explore Air 2 machine! (It's also available in Rose and Blue.)

Cricut Tool Kit
To create the background for my wall art canvas, I used a 12" by 12" pre-primed canvas from a major craft chain store. Then I used a large brush to swipe green acrylic paint back and forth across it, but stopping short of the edges by about an inch. Once that paint was dry, I used a stencil to dry brush a design on top of the green in white acrylic paint.
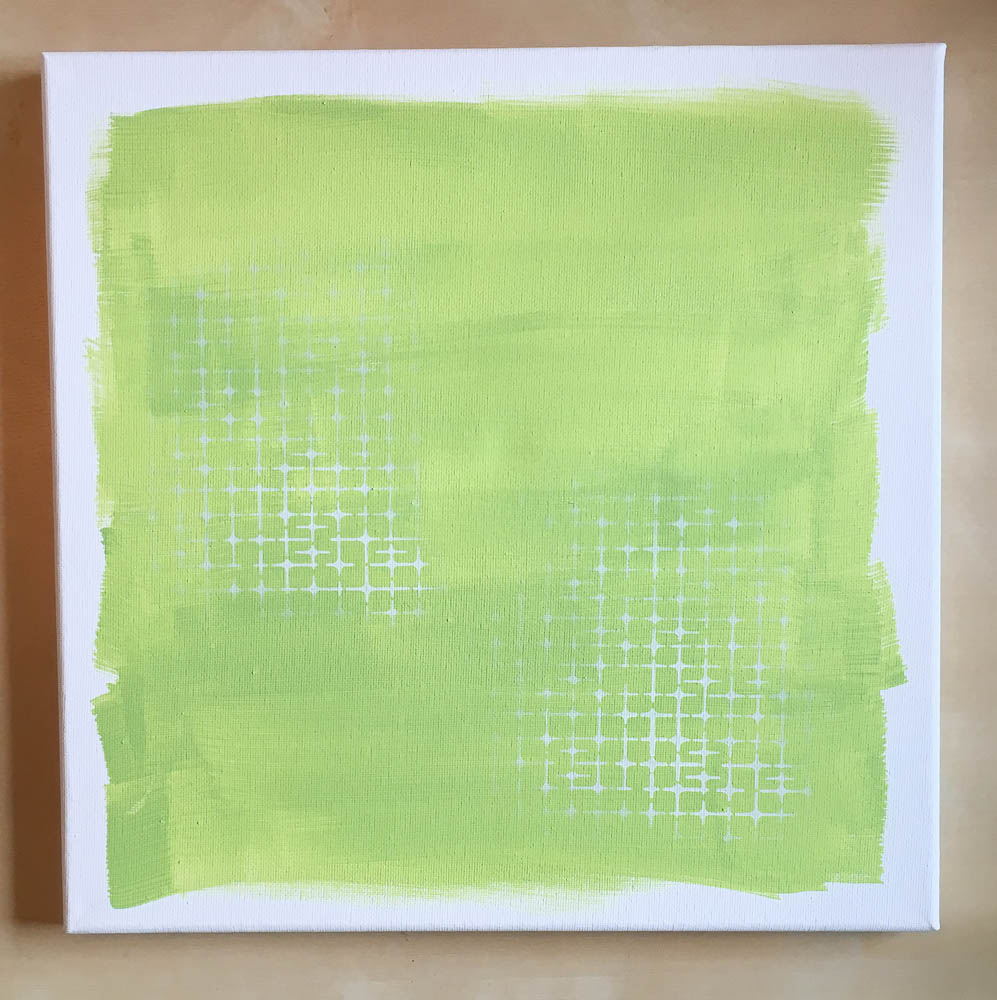
Cricut Wall Canvas background
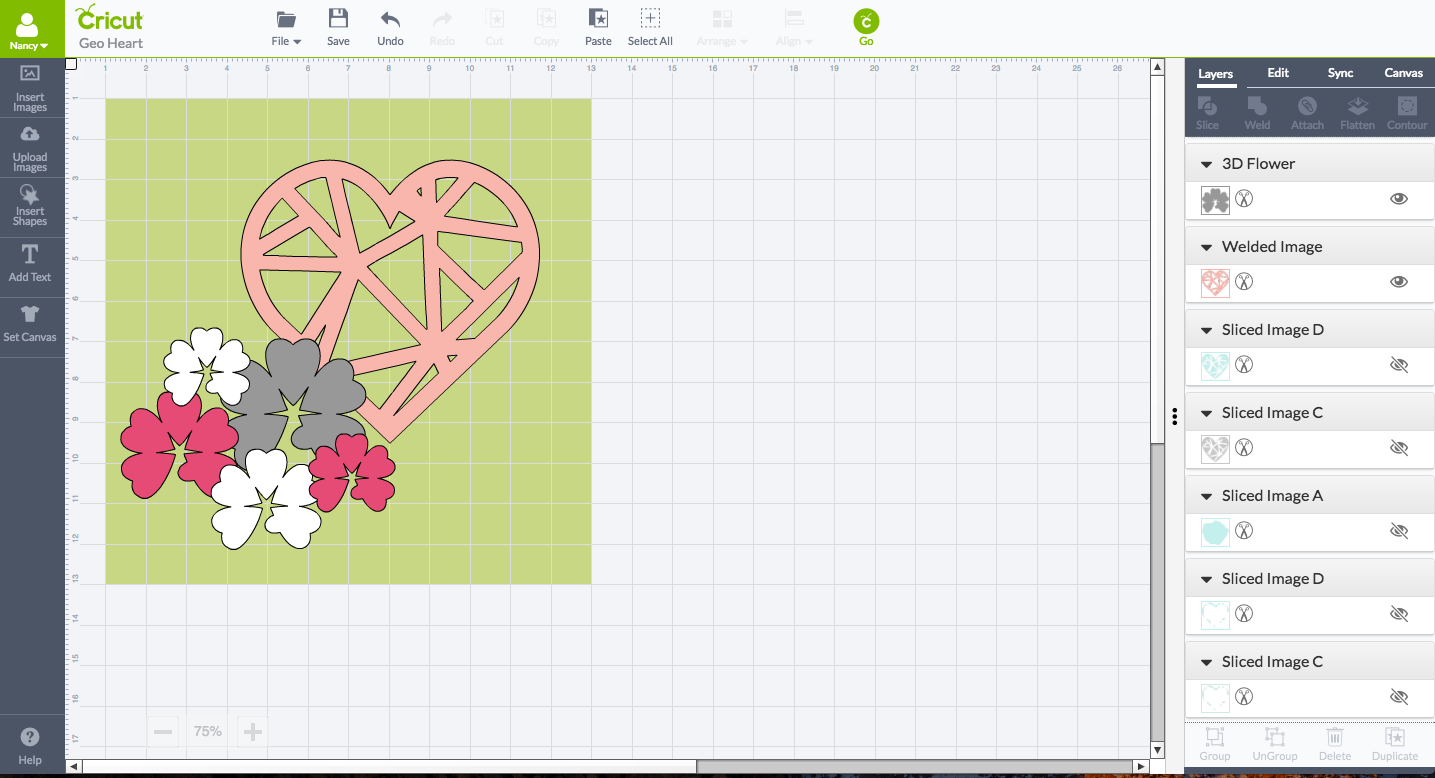
I've been a bit obsessed with geo hearts lately, so I decided to make one in Cricut Design Space for this canvas! The Vintage Revivals cartridge had just what I needed, a geo shape that I could slice. Then I searched and chose a heart that had an outline of about the same thickness. I laid it over the geo shape in a way that I liked, duplicated it and set the duplicate aside (this will be important later), and then used the slice tool to cut the geo shape.

Cricut Geo Heart Construction
Next I removed all of the sliced pieces that I wouldn't need in my finished piece. This was followed by using the basic shape tool to lay another (this time solid) heart over the remaining geo structure and slicing again. Then I took that heart that I had set aside, and laid it over the geo design, selected the heart and the geo design, and hit "weld" to create my geo heart!

Cricut Geo Heart construction
This ability to experiment and try things (and hit the undo button if they don't work and then try again) is one of the things I love about Design Space. But if all of that seems like a lot of work to do...here's the link to my completed Geo Heart file that I'm sharing in Design Space.
Cricut Geo Heart construction
Once I had created my geo heart, I made it 7 inches high and added some 3D flowers from the Flower Shoppe cartridge to my design. If you'd like to be able to replicate my design, here's a link to the design I created in Cricut Design Space.

Cricut Holographic Vinyl
I've worked quite a few times with Cricut's regular vinyl, but the Cricut Holographic Vinyl is more like foil than vinyl in appearance, and weight. It cut beautifully and just like vinyl on my Cricut Explore Air 2 machine, by using my Smart Set dial on the "vinyl" setting. This pink is dark pink and, depending on the light and angle that you look, will turn almost burgundy. (There's also a gorgeous lighter pink color that is called Opal.)

Cricut Tools for Vinyl
I've always found weeding to be a bit of a zen experience. It can be challenging, for sure (especially when there are small details in a design), but there is something immensely satisfying about the sort of reverse jigsaw puzzle effect of watching the design reveal itself.

Weeding Die Cut Vinyl
Once the design was completely revealed, I laid a piece of Cricut Transfer Tape on top of it and peeled it up and transferred the heart to the upper right corner of my canvas. To press it down on my canvas with my tape, I laid a book underneath the area of the canvas the heart was going onto so that the canvas was better supported and was flat.

Cricut Geo Heart
The Holographic Vinyl is thin enough that it will take on the texture of the item is it applied to, so surface preparation is important! The material is delicate, but the transfer tape held it tightly and then released it perfectly without ripping the vinyl or damaging the painted surface. (I also recently used the Cricut Transfer Tape to apply vinyl to a kraft paper notebook cover and it released from the paper cover perfectly without damaging it when I was done applying my image.)

Cricut Glitter Flowers
Next, I used Cricut Glitter Paper to cut my 3D flowers. I'm normally not a huge fan of working with glitter paper, as it sheds and is difficult to cut without it losing a lot of glitter. This glitter paper is none of those things! The glitter on this Cricut paper seems to be finer than most other glitter papers that I've tried, and is extremely well adhered. It cuts absolutely beautifully, and having tried it I will now be looking for excuses to cut glitter things on my Cricut. (Luckily I have a teenage daughter so it won't be hard!)

Cricut Glitter Flowers
I used a hot glue gun to assemble the flowers and then also to adhere them to the canvas. Before I glued them in place, I rolled the ends of the petals around the Cricut Scoring Tool to give them a nice curve. For the smaller flowers, the small point of the tool was used for rolling the petals around. I finished the flowers with buttons hot glued into their centers.

Cricut Geo Heart Wall Art
This Geo Heart Wall Art is great for a teen girl's room. I used my 14 year old daughter's bedroom wall for some of the photography for this article, and I'm not sure that I'm getting this project back!
This is a sponsored conversation written by me on behalf of Cricut. The opinions and text are all mine.