
Another Versailles Layout + NSD Sale!
Today I’m sharing another layout of the palace of Versailles, but this time it comes with an extra National Scrapbook Day treat for my readers - a storewide sale in my Etsy store!
Disclosure: This site participates in the Amazon.com affiliate program. Some links on this site are affiliate links that pay this site a commission at no cost to the reader when a purchase is made after a click. Some product used in this product was provide to me by Cricut but this is not a sponsored post.

Supplies
Prima Marketing “Midnight Garden” 12x12 paper pad (Scrapbook.com, A Cherry on Top, Amazon)
Ranger Tim Holtz Distress #8 tag (Scrapbook.com, A Cherry on Top, Amazon)
Recollections Metallic Paper - Copper
Bazzill Smooth Cardstock - Cream
Tim Holtz stamps - Postcard (A Cherry on Top, Amazon)
Tim Holtz stamps - Artful Flight (Amazon)
Ranger Tim Holtz Distress Oxide Ink - Gathered Twigs (Scrapbook.com, A Cherry on Top, Amazon)
Ranger Tim Holtz Distress Ink - Pumice Stone (Scrapbook.com, A Cherry on Top, Amazon)
Ranger Tim Holtz Distress Ink - Antique Linen (Scrapbook.com, A Cherry on Top, Amazon)
Ranger Tim Holtz Distress Ink - Hickory Smoke (Scrapbook.com, A Cherry on Top, Amazon)
Ranger Tim Holtz Distress Embossing Ink (Scrapbook.com, A Cherry on Top, Amazon)
Ranger Super Fine Embossing Powder - Copper (Scrapbook.com, A Cherry on Top, Amazon)
Heidi Swapp wood embellishment
Plaid Home Decor Chalk Paint - Maui Sand (Amazon)
Plaid Folk Art Acrylic Paint - Wicker White
green ribbon
28 Lilac Lane embellishment kit - Victoria
PPA Matte Adhesive (A Cherry on Top, Amazon)
Small Flat Paint Brush
Sandpaper
Tonic Tim Holtz Paper Distresser (Scrapbook.com, Amazon)
Lettermate Tool
Pigma Micron 03 black pen
Cricut Maker machine (Cricut.com, A Cherry On Top, Amazon)
Cricut Printable Sticker Paper (Cricut.com, Amazon)
You might notice the first line of the supply list - the Midnight Garden paper pad by Prima - sounds familiar. That’s because it is the same paper collection that I used on the last layout I did of Versailles. That’s because I made a promise to myself awhile back that I will be more mindful about using the supplies I buy, instead of buying more than I can use and letting them accumulate until they become overwhelming and get given away. (You’ll hear more about this promise in a future article.)
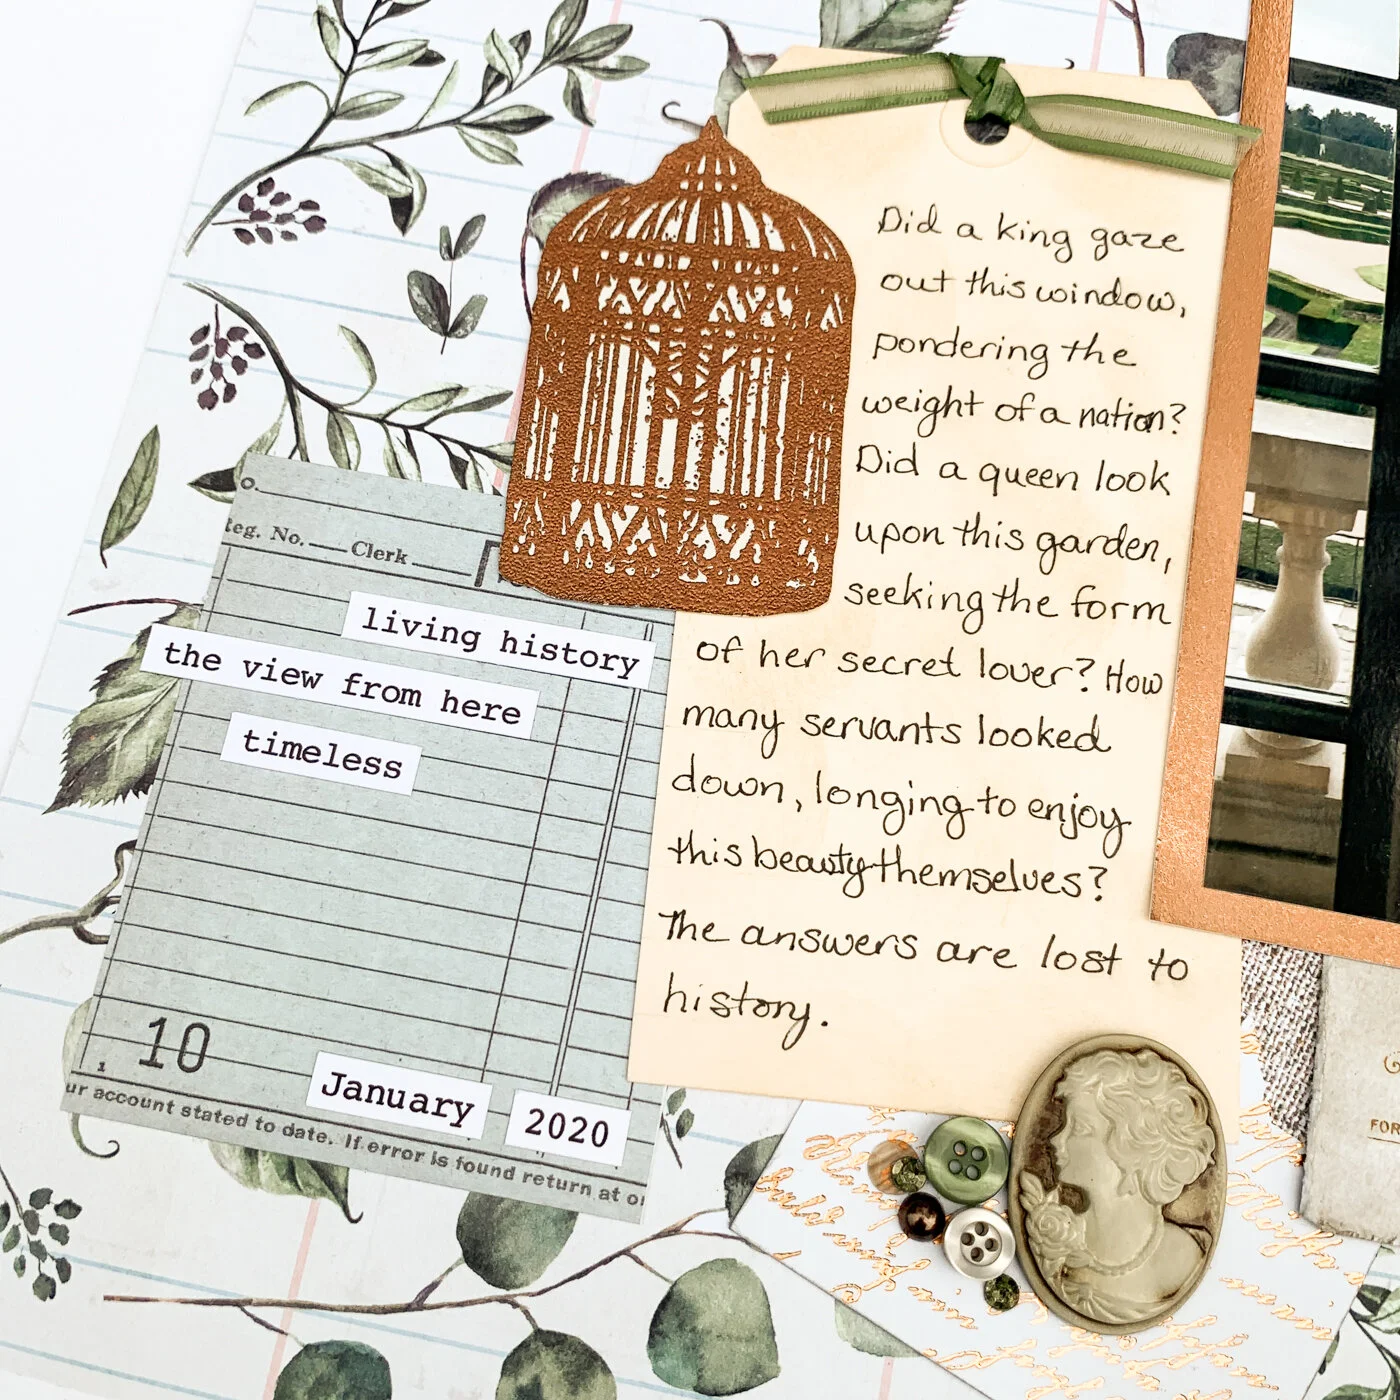
Framing a view in a window can really help tell a story. I was really drawn to the windows when I was touring Versailles. In a place so grand, there is something small and intimate about a simple (or not so simple, as some were really ornate) window latch. And the symbiotic relationship between the house and gardens is best experienced standing on the border between the two.

I chose a patterned paper with greenery to draw the eye to the garden outside the window. Matting the photo on metallic paper added warmth, especially since I used copper instead of a cooler gold. And of course it gave it some Versailles elegance! The tag for adding my journaling reflected the path in the garden while also carrying the botanical notebook feel of the paper.

Speaking of wanting to use what I hoard…I dug some really old Tim Holtz stamps out of my stash for this layout. These two classic sets are ones I go back to often, especially the postcard set.
I wanted to add another copper element and so I chose to heat emboss this birdcage stamp in copper. After it cooled, I cut it out right along the edges of the design.
I used the postcard set to create a faux antique postcard element for my layout. I started by stamping one of the postcard logos on a piece of antique patterned paper from the Midnight Garden paper pad. I used Distress Oxide ink for this because it gives a softer, more aged looking stamp impression.

Next I used Pumice Stone Distress Ink and my inking tool to “age” the paper even more. I think I overdid it a bit. This “postcard” has really been abused!
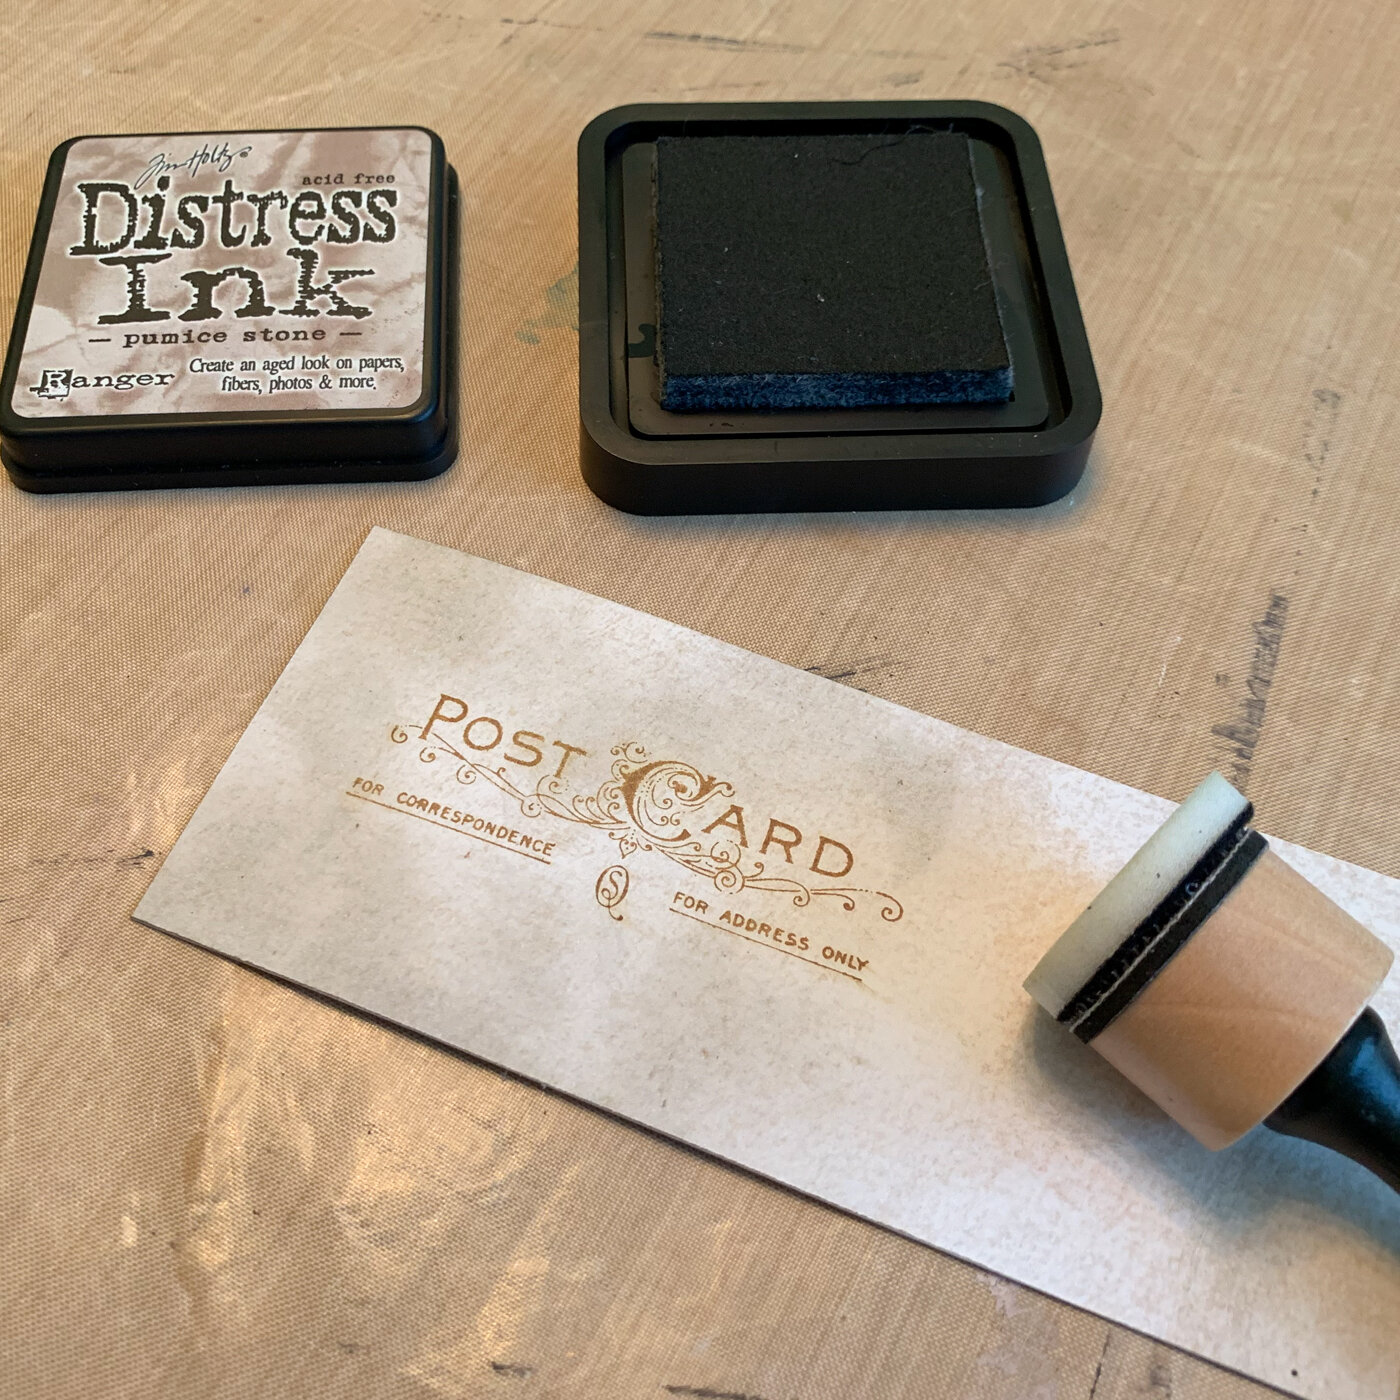
Finally, I cut my postcard fragment down to the approximate size I wanted it. Then I used the Tonic Edge Distresser to make the edges look old. When I roughed up the edges, it exposed bright new white looking cardstock. So I got out my inking tool and distressed them with some more Pumice Stone.

Note that nothing was glued down at this point, which is why I was able to create this postcard and put it under my photo several steps in to my construction. I usually don’t glue anything until nearly the end of making a layout for just this reason.

I find sheets like this collage to be too busy to use with my photos usually. But I love them because they are absolutely fabulous to use as cut apart embellishments, and they are just the kind I like to use! For this Versailles layout I used the upper left and lower right of the sheet. I’m sure many more of these will get used on future layouts…I mean, who doesn’t love that pink “adventure” tag?

I used the two pieces I cut from the collage patterned paper sheet to extend the collage on my layout. With the addition of those pieces, and the title element, I was finally happy with the layout’s balance.

I probably could have just left the Heidi Swapp wood element bare for the title. But I just can’t leave things alone! So I painted it with Maui Sand Chalk paint and then distressed it with some white acrylic paint.

No matter what I’m writing on, I have to use my Lettermate to put some straight lines on it first! It keeps me from making you all seasick reading my waving wandering lines. I drew my lines on the tag, then positioned it and marked off the areas where it would be layered under things so I could write and it would all be showing. Then, after my ink dried, I erased my lines.

Finally, I added a few embellishments. First I raided my 28 Lilac Lane “Victoria” embellishment kit by the ever-talented May Flaum for some bits and baubles. Doesn’t that lovely cameo lady just look like she should be at Versailles? I glued her, and all the other embellishments from the kit, with my go-to adhesive for this kind of thing: PPA Matte.
For a little added journaling, I got out copies of my “Travel Memories” and “2020 Calendar” printable stickers from my Nally Studios store on Etsy. These downloadable files allow you to make your own itsy bitsy word sticker sheets using your home printer and Cricut, Scan n Cut or Silhouette machine,
(Wondering how these work? Check out my Facebook Live demonstration!)

If you’d like to get your own copies of my printable sticker files, here’s a treat for you! My entire Nally Studios Etsy store is 20% for National Scrapbooking Day through Monday! Just use code NSD20 (or click this link) to get my printable sticker files, or title SVGs for 20% off!
