
Project Reboot | Project Life 2012 - First Steps
Welcome to Project Reboot on Scrapbook Update! This article is the first in a new ongoing series I'm going to be bringing you about how to rescue - or reboot - projects that you've abandoned half-completed or even just in the planning stages, so that you can make them into something that is completed that works for you!
The first few articles in this series will focus on Project Life. I hope you find them useful!
As I discussed on last week's Paperclipping Roundtable episode about Project Life, I have been basically stalled on my 2012 Project Life. I love the concept of Project Life but was having trouble executing it in 2011 and 2012.
I got off to a good start for 2012, or so I thought. I really love the new Clementine kit this year, and I had decided to try Project Life digitally in 2012 to see if it would go better for me than the paper version that I tried to work with in 2011 but couldn't stay with.
My digital cover page went quickly and I was really happy with the results. I didn't follow the template of elements that the kit suggests using for the title page. Instead, I used a mix of title page and inside elements to create a collage of elements that were customized to send a specific message and set a theme.
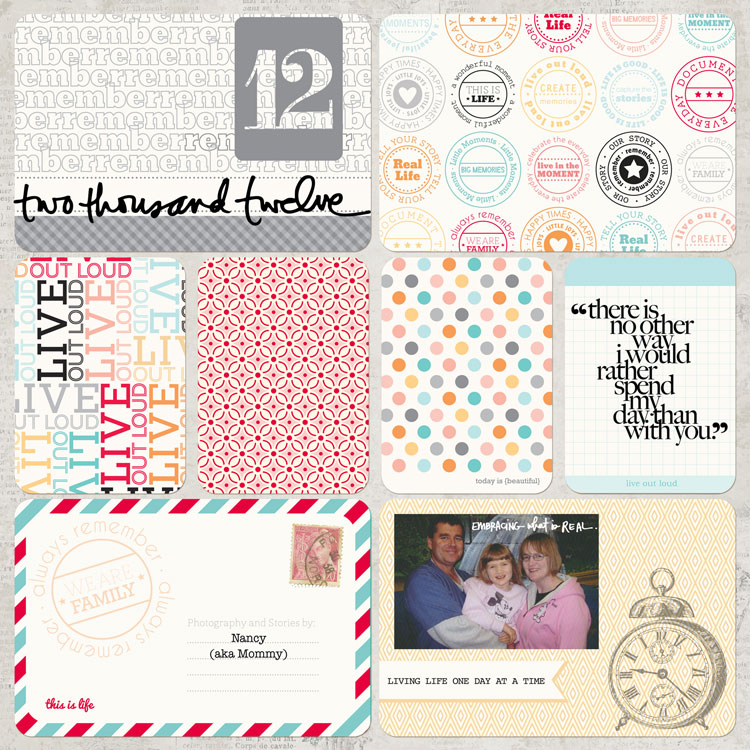
Supplies: Becky Higgins Project Life - Clementine Full Kit (digital); Katie Pertiet From My Bookshelf Solids; Ali Edwards "Twenty-Twelve" Brushes & Stamps; Ali Edwards "You" Sentiment Quotes; Ali Edwards "Moving Forward" Brushes & Stamps; Ali Edwards 3x4 Number Cards; Lynn Grieveson French Summer kit (stamp).
But then as I started to try to begin my first page...I balked. Digital Project Life wasn't working for me so well after all. So, I converted my digital Project Life title page into a paper one, through a combination of printing out the digital kit elements and layering computer printed things (like the photo) on top of the matching Clementine paper kit elements.

But after making that conversion, I found myself still "stuck" on trying to construct pages for 2012. Digital vs paper wasn't my only problem. The big challenge I quickly found myself facing is that due to the nature of our situation with my husband's incarceration and my daughter's illness, our daily life at home is very repetitive and we don't really go anywhere or do anything except work and school. I take very few pictures as a result, except of our daily life at home. And 52 double-page spreads of that would be either boring, or filled with an obsessive level of detail that I wasn't interested in recording.
This drought of pictures is broken periodically by a sudden flood of pictures of a rare special event - one of my CHA trips, or a day at DisneyWorld, for instance. So how to manage this imbalanced stream in a Project Life album became a big challenge that I was wrestling with.
After the discussion on the Roundtable show, I felt inspired to revisit the challenge of implementing Project Life in my life, and I was equipped with some new ideas of how to do it. Here's what I came up with on my second attempt at 2012, and how I'm getting caught up.
The first thing I did is decide to break my Project Life into multiple albums. Wait, didn't I just get done saying that one of my problems was that I didn't have enough pictures for one Project Life, let alone two? Yes, but I also realize I have been facing another roadblock to completing my Project Life album. Some of my content is related to my husband being away, and the travel that I was doing (until his recent move closer to home) to see him. The presence of that content was casting a serious tone over my whole Project Life. So what I've decided to do is create a separate Project Life album for the content related to my husband's DOC life (and my interaction with that), and then record life at home in its own album. Basically, I'm creating a walled garden for the DOC content so that I don't have to deal with those emotional issues to enjoy the pictures of my daughter and life at home. This will also allow me to be more raw in the private album about my husband's life - it can become more of a journal - while the album about home can be more fun and more for public consumption.
(The rest of this article series will focus on the creation of the "home" album.)
Next, I settled on a way to tackle my alternating trickle and flood of pictures. I've set up my Project Life album with a two-page layout for each month, and then I can expand on that by adding in additional layouts for special events or adding in extra small sheet protectors for extra space. Since it's May and I'm trying to get caught up for 2012, I added sticky notes to the upper left corner of each layout with the name of the month to help me track which month is which while I work.
A quick survey of my photo library in Adobe Lightroom told me that I needed extra protectors for layouts for CHA Winter 2012, my day at Disneyland, a trip to Cleveland to tape Scrapbook Soup, and my daughter's birthday at DisneyWorld. So I added in the four extra protectors for those events, after the pages for the months that they took place in, and labeled them with sticky notes as well.
I know that for some of my layouts as I construct them I may decide that I want to use "add-on" sheets - additional smaller sheet protectors that house journaling or photos or memorabilia. That's why I have purchased the American Crafts 6x12 page protectors, and Becky Higgins Project Life Design G page protectors. I will also be ordering the American Crafts 10x12 page protectors and the American Crafts 6x12 page protectors for 4x6 horizontal photos as soon as I finish filling my shopping cart. In July, Becky Higgins will be releasing additional small page protectors for Project Life, and I plan on purchasing some of those to add to my album as well. I love having options of how to arrange my photos!
Now that I have my framework, I need to start adding content. I could have done one layout at a time, but I'm a big fan of the concept of batch processing - doing all similar aspects of a task all at once - and I find that it enhances my efficiency. So I've decided to batch process my Project Life layouts that I'm trying to catch up on.
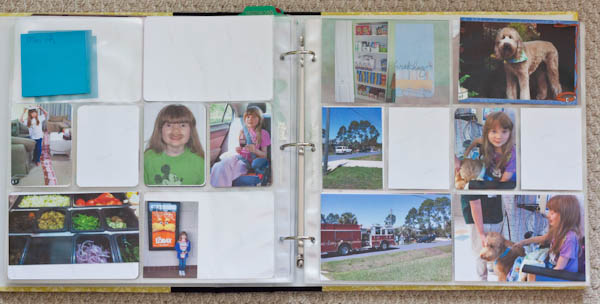
So the first element that I'm starting with is my photos. I'm printing out all the photos that I need for the layouts and putting them in pockets. They may get moved around later but at least I'll have an idea if I have the right number of each size and they will be stored in the right place. I'm also at the same time inserting into pockets any paper memorabilia that I had stashed for these layouts (which isn't much) to make sure that space is saved for those items as well.
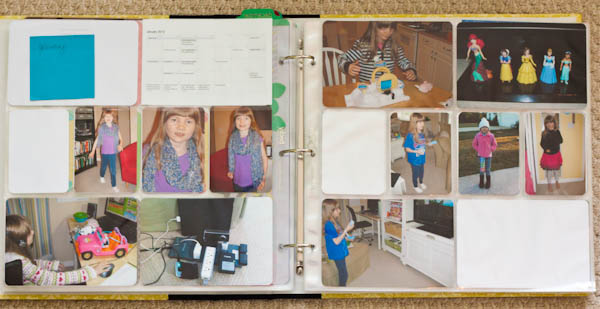
This is what I ended up with for January. Next to the sticky note at the top there is another thing that I added - a printout of a screen capture that I made of my calendar for the month. It captures my activities for the month and makes good filler as well. I plan to do those for all of the months if I can fit them.
I rounded the corners of my photos as I put them in the pockets using the small EK Success Paper Shaper corner rounder (the yellow one). I find this punch matches the corners on the Project Life core kit elements very well. The only exception to this is if the photo was definitely or possibly going to be mounted on a patterned paper mat. Then I left the corners square to be dealt with later.

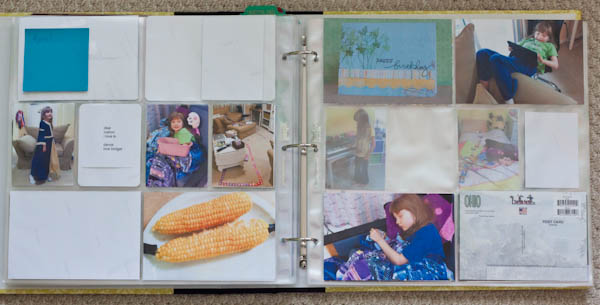
I got through a few more pages of printing before being brought to a grinding halt by a shortage of printer ink. I'll be able to continue printing after my UPS man brings my Amazon box tomorrow. (Guess we know what my weekend project is!)
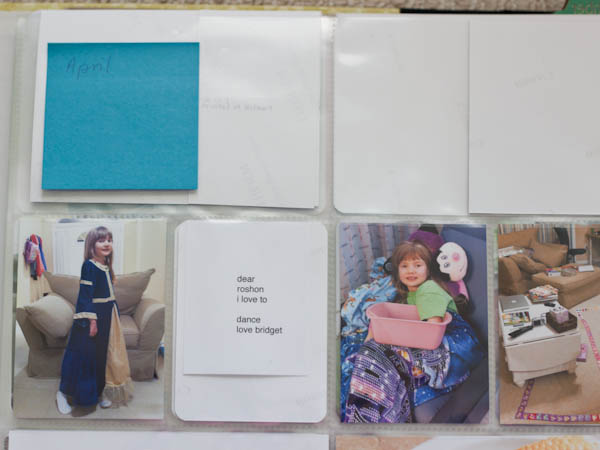
Here's a closer look at one of the pieces of memorabilia that I tucked into a pocket while I was doing the photo printing - a fan letter that my daughter typed out to Roshon Fegan on my computer when I walked away from my laptop with Pages open. (He's on her favorite Disney Channel show, Shake It Up, and she was absolutely glued to Dancing With The Stars watching him ballroom dance. She loves anything musical!) It will eventually be mounted on a cardstock holder of some sort, but at least now the space is set aside for it as I take the next step in my album's development.
The process of doing all this bulk photo printing has been somewhat tedious but doing it all at once gets it done much faster than if I did it in small batches. So in the end, it's more productive to do it this way and then it is just done.
Next I will start to move on to giving each section a bit more form through the addition of secondary content and decorative elements! I can't wait to get started on that...and to share the results and what I've learned when it is done.