
Scrapbooking with Hard To Use Paper
We all have it in our stash, and it's okay to admit it - you've got scrapbooking paper that you're nervous to use. You know the paper I'm talking about - paper that's too pretty to cut into, or has a huge or heavily repeated pattern that you're afraid of covering up. The kind of paper that can baffle your scrapbooking mind.
That paper.
I will freely admit that I have a lot of that paper in my stash. Some of it's new, some of it's old (but I still love it), but it all has one thing in common: it needs to be used! It'll at least be seen if I use it in an album. It's not doing anyone any good sitting in a Cropper Hopper on my shelf.
As it turns out, there are lots of ways to use that paper, and I'm going to share several of them with you right now!
1. Cut It Out
This option may be the most natural one for traditional scrapbookers since we're all so used to pulling out scissors, trimmers, and craft knives anyway. There are many different ways to use creative cutting in your scrapbooking, and the technique that you choose will largely depend on the type of design that's printed on your scrapbooking paper.
One of my favorite techniques for creative cutting is to use a craft knife to carefully cut along the edge of a design (without completely detaching it from the paper), allowing photos, embellishments, or other pieces of paper to be tucked under the cutout. Large designs that are located for the most part on the edge of a sheet of paper work best with this technique, and I've included a few examples of this type of pattern below (from left to right: Glitz Dance in Sunshine "Polka", Pink Paislee Nantucket "Lobster Bisque", My Mind's Eye Lost and Found Christmas "Noel").
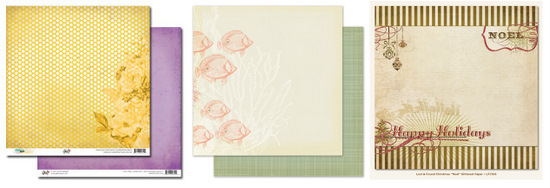
Can you see the opportunities for creative cutting here? The flowers on the Glitz paper are perfect for trimming with a craft knife and then layering over photos, as are the fish (or even portions of the coral) on the Pink Paislee sheet, and the ornaments, "Noel," and Santa's sleigh on the My Mind's Eye print are all prime candidates for a bit of cutting.
This peek at an older layout of mine (circa 2007, so unfortunately neither of these papers from the now-defunct Tinkering Ink are currently available) shows how I used a craft knife (and also a bit of careful scissor cutting) to trim and layer not one, but two sheets of paper over my photo.

Another way to use creative cutting on your pages is to actually cut elements completely out of a sheet and use them as embellishments. This technique works well for prints with an all-over or repetitive design. The papers below (from left to right: My Mind's Eye Lost and Found Two - Blush "Beautiful Girl Labels", October Afternoon Farmhouse "Clothesline", Bella Blvd. Christmas Wishes "North Pole") are all perfect examples of prints that are just begging to have pieces cut out and used as accents.

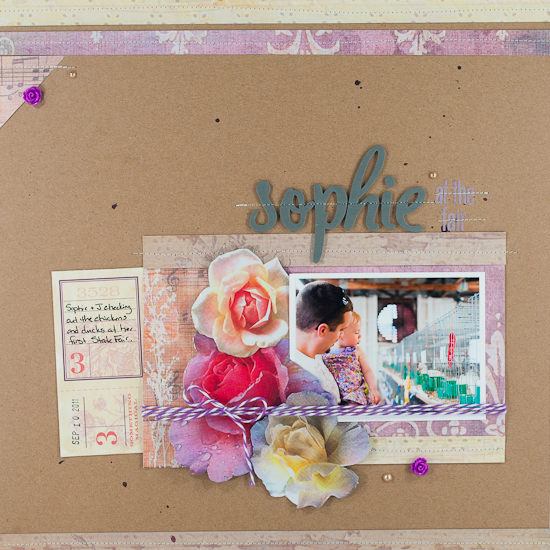
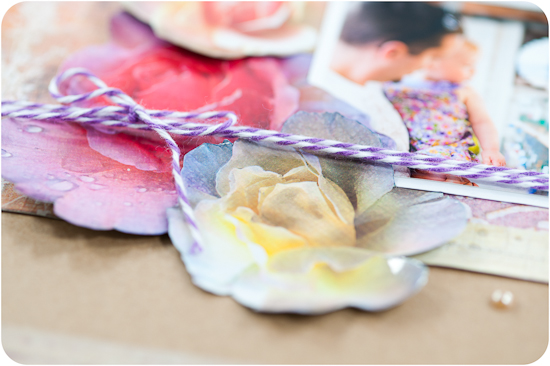
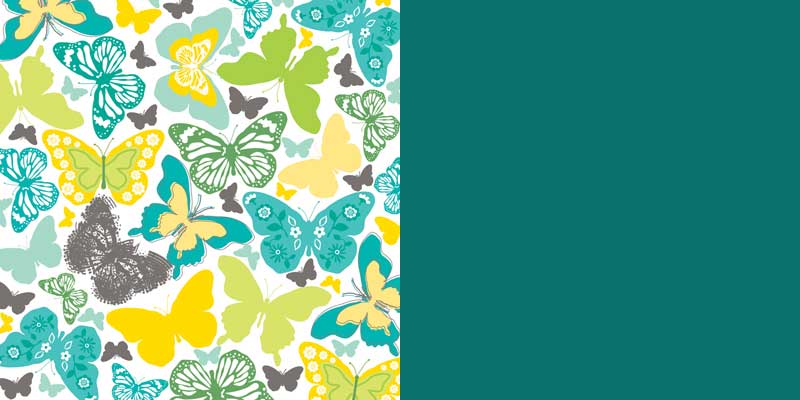
Cutting elements out of papers and using them as embellishments is actually one of my personal favorite techniques for using papers with this type of print. As an example, I took this lovely sheet from Donna Salazar's In Bloom collection from GCD studios and cut several of the roses out to cluster around a photo on a layout.
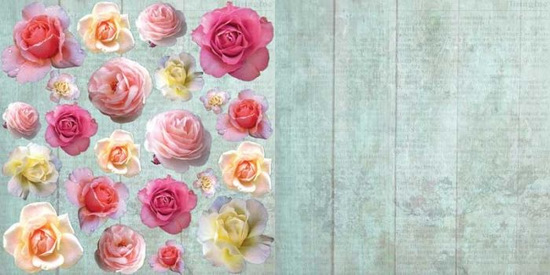
The resulting page uses bits from other papers in the collection, as well, and carries the same feel as the original print while completely regrouping the patterns to allow for white space, photos, and a few other embellishments. And since I only used a few of the flowers, I have many, many more that I can use on other projects, meaning that I've really stretched the value and gotten the most out of a single sheet of paper.
2. Scrap Around It
If cutting isn't your thing, then perhaps you'll want to consider simple "scrapping around" large patterns on your scrapbook papers. Many prints that are candidates for creative cutting with a craft knife are also great to use with this technique, and I've also got a few more examples to share with you below (from left to right: Pink Paislee Vintage Vogue "Tailored Suit", Webster's Pages Western Romance "Love Letters", My Mind's Eye Lost and Found 2 - Blush "Favorite Party").
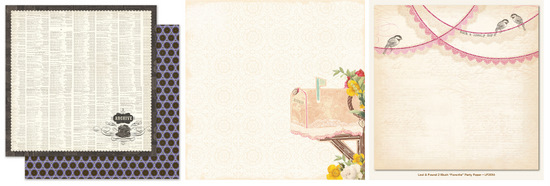
Each of these papers has a large element printed on it, but they also all contain a good amount of negative space that's perfect for placing photos and other embellishments while still allowing the original pattern to shine through. Think of the printed designs as part of your page embellishment- perhaps even adding a few touches of your own (small items such as brads, buttons, and bits of bling are perfect for this application) to tie the printed design with whatever you choose to add to make it yours. For these types of pages its often helpful to use smaller photos that can be placed in the blank spaces on the page without interfering with the printed pattern.
3. Show it Off
So far we've looked at ways to use papers that have challenging prints (and the "show it off" technique could definitely apply to anything that I've talked about so far), but what about those papers that are just so pretty, or have such big prints that they aren't really candidates for creative cutting or scrapping around them? How about this: let them shine on their own!
Here are a few examples of this type of paper - big, all-over prints that don't lend themselves well to being cut apart in used in small bits (from left to right: October Afternoon Sasparilla "Giddy Up" and "Dash Dalton", Crate Paper Random "Wallpaper").
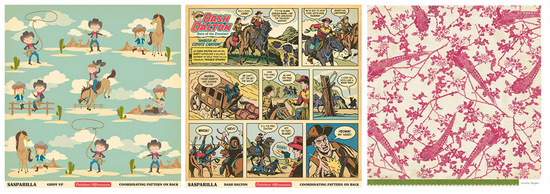
For these types of papers, I recommend choosing a page or project design that allows you to use large sections of the paper in one big chunk without any photos or other elements layered on top of them. This category of print is also perfect for using in divided page protectors such as the huge array offered by We R Memory Keepers or those from Becky Higgins' Project Life collection. Simply cut out a section of the paper that includes one of the focal points of the pattern (in order to get the maximum effect) and slip it into a pocket alongside the rest of your photos - it's easy, quick, and adds a bit of flair to your photo albums!
May Flaum also has an excellent example of using the October Afternoon "Dash Dalton" paper on a tag in her recent Scrapbook Update article on the current "Old West" trend in the industry.
4. Use It Alone
I know that many scrapbookers struggle with what to use as a beginning, ending, or dividing page within their albums, so this next technique will actually solve two problems at once! Some papers such as the ones shown below (from left to right: Studio Calico State Fair "Midway", October Afternoon Farmhouse "Gravel Road", My Mind's Eye Mischievous "What a Hoot") have such big, busy (and pretty!) patterns that they really seem to deserve to stand completely on their own.
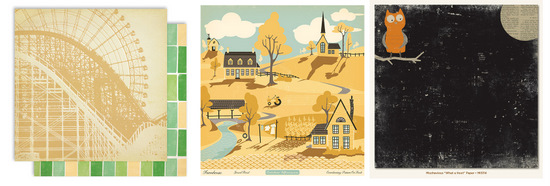
Instead of agonizing for hours over how to scrapbook your photos with these papers, consider using them just as they are, or perhaps with a small title or date added, as I did with this sheet from Melody Ross's Ava collection for GCD studios.
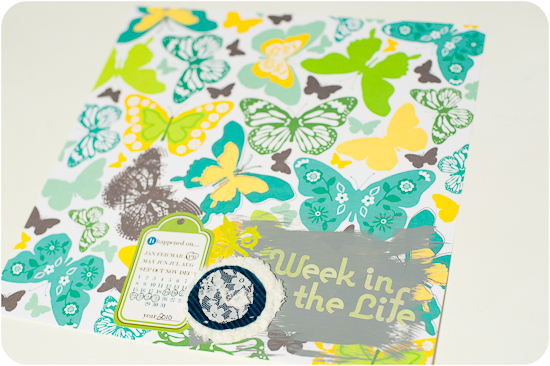
This paper was so lovely that I wanted to use it as a whole, so I left it largely as-is and added only a bit of paint and a few embellishments (all from one of the 2009 Scarlet Lime kits) and used it as the title page for my 2010 Week in the Life album.
So go ahead- plop one of these lovely papers straight into your album just as it is and let it shine next to your photos! This is also a great way to fill in a space next to a single-page layout that totally clashes with the page next to it - simply stick a matching piece of paper into the protector next to a layout and move the clashing page over to the next slot.
5. Save It
So we've gone through many different ways to use those papers that you've been afraid to cut into, but perhaps you still haven't found anything that inspires you to use that lovely sheet. I get what you're feeling - I really do - but before I dive into some ways that you can save that sheet of paper (while still making it useful), I recommend that you read Shimelle Laine's hilarious (and oh, so true) Story of the Special Paper. Shimelle recounts her own struggle with not being able to use paper that was just too "good" for any of her photos, and it may help put things into perspective for you.
Now that you've decided that your life will simply not be complete unless you have this lovely sheet of paper, untouched and intact, in your stash, let's look into some ways that you can have that without it taking up a lot of space (and guilt) in your scrapping area.
My personal favorite way to get around this issue is to look for a digital version of the paper. Several manufacturers such as Basic Grey, Cosmo Cricket, Echo Park, and Webster's Pages offer many of their designs in digital format. Sometimes, when I just don't want to cut apart a page for fear of never having that pattern again, I'll go an purchase a digital version of the same paper or collection to soothe my fears. If all else fails, I can always print it again, and no matter what it will be available to me on my computer whenever I want to gaze upon its loveliness.
If you love the look of a paper, why not consider using it as a decor item either in your home or your scrapping space? The same 12x12 frames that are used to hang layouts on the wall can just as easily be used to frame an untouched sheet of scrapbook paper. A grid of these frames would make a lovely statement in any room of your house!
6x6 paper pads are also an excellent way to preserve a pattern while taking up a lot less space than a full sheet would (provided you use up the rest of the papers in the pad). In fact, the smaller scale of the patterns in 6x6 pads makes difficult to use prints much more accessible - so much so that I personally now buy a 6x6 pad of a paper collection along with only a few (perhaps 2 to 4) large sheets to use in my scrapbooking. Scrapbook Update Editor Nancy Nally recently wrote a post on the 6x6 paper pad trend that would be well worth reading if you're considering going this route.
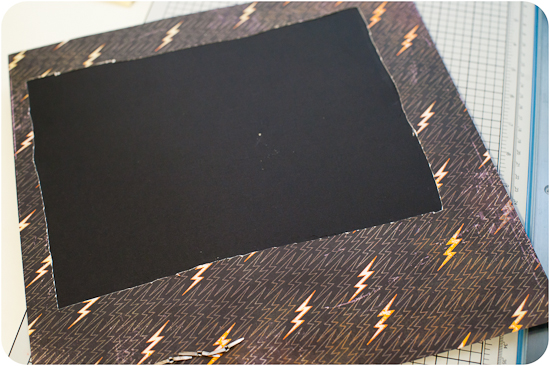
If you can survive using part of your sheet of paper but want to save every bit of it that you can to use on other projects, consider cutting out portions of the paper from the back of your layout that don't show through on the front. For example, the photo below shows a layout I made with a sheet of paper from Basic Grey's Eerie collection. The front of the page has a large block of photos matted on black cardstock laying over the majority of the pattern, so when my page was finished I flipped it over and carefully cut out the portion of the paper that doesn't show on the front using a craft knife and a small pair of scissors. That big cut-out chunk of paper was then used in other projects.
Hopefully at least one of these ideas has inspired you to use some of the more challenging papers in your stash! If you're struggling to use a specific product, Scrapbook.com has an excellent feature in their store that may be helpful to you. Simply search for the product that you'd like to see examples for, and your search will turn up not only that product, but also projects in the user gallery that use that same item. Remember: your fellow scrapbookers are in the same boat when it comes to using these papers, and one of them might have the perfect idea to help with your next layout.