
Getting Started with Make It Now on the Cricut Explore Air 2
This is a sponsored conversation written by me on behalf of Cricut. The opinions and text are all mine.
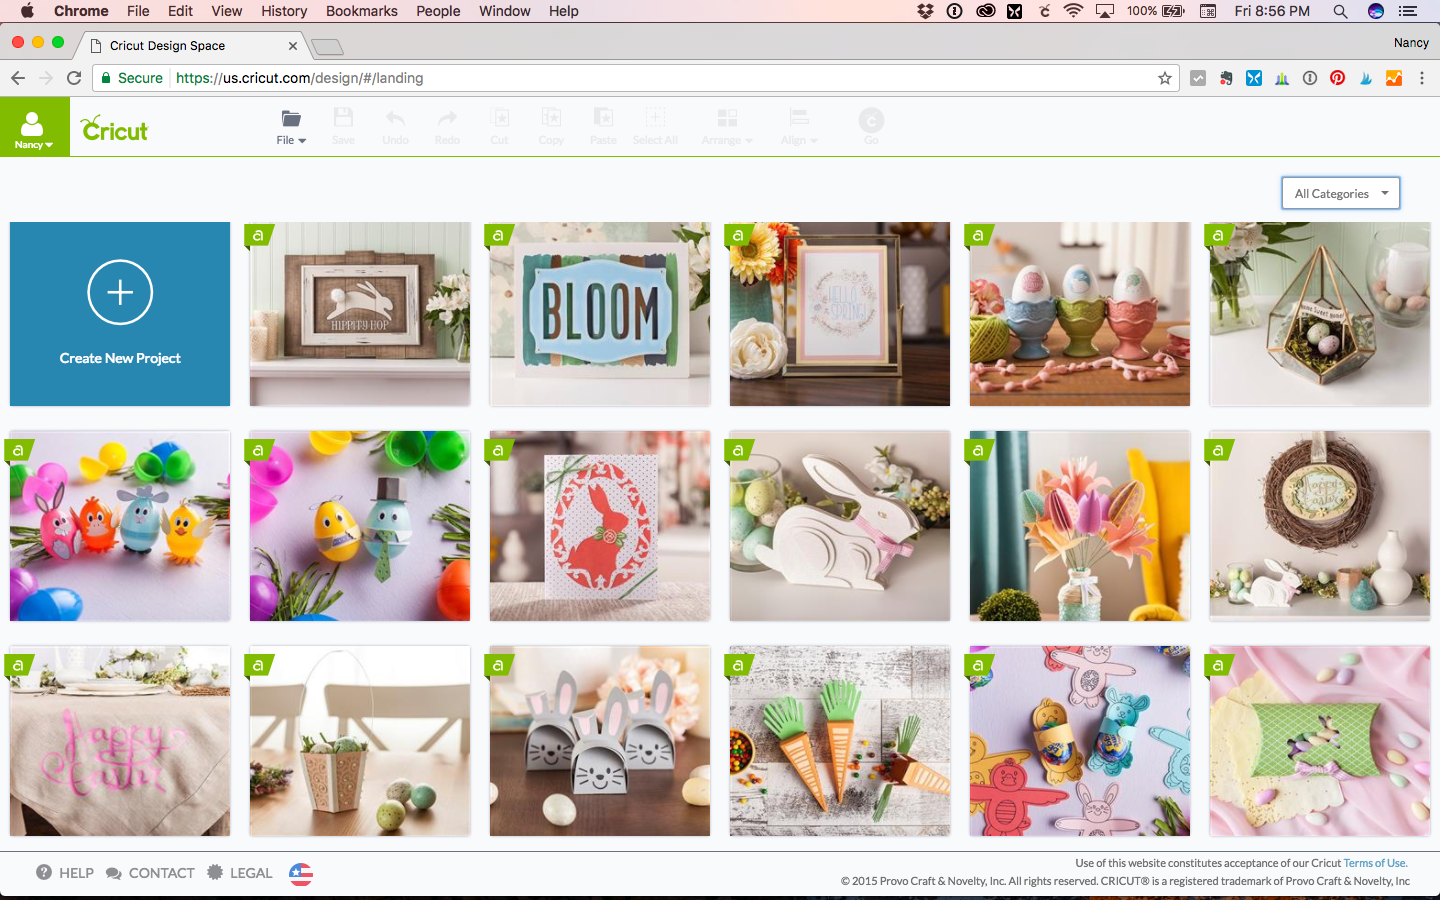
Because it requires using software on a computer (or a phone app), a lot of people are intimidated initially by using the Cricut Explore family of machines. But Cricut Design Space has a built-in shortcut for learning how to do almost anything with the Cricut Explore Air 2 machine: the library of Make It Now projects!
Cricut Design Space
The Make It Now library of projects, which is what you are looking at when you open the main screen of Cricut Design Space, is like having training wheels for your Cricut Explore machine. Whether you are trying to use the machine itself, or trying a new material or accessory tool (like the stylus) for the first time, a Make It Now project will hold your hand while you do it. The Make It Now projects have been set up by the expert designers at Cricut to create an entire project flawlessly from start to finish. It takes the guesswork out of working with new tools or materials. There's no guessing, so you can get perfect results the first time!
One very popular use for the Cricut family of machines is to cut iron-on material to create custom shirts, bags, and other items. Cricut sells an extensive palette of iron-on materials that the machine's built-in settings are calibrated to cut. Working with iron-on, though, has a bit of a learning curve. Make It Now projects to the rescue!
Probably my all time favorite Make It Now project is the "C'est La Vie" t-shirt designed by my friend Anna Rose Johnson. This fun t-shirt features two layers of iron-on that together create the phrase and a glittered heart.
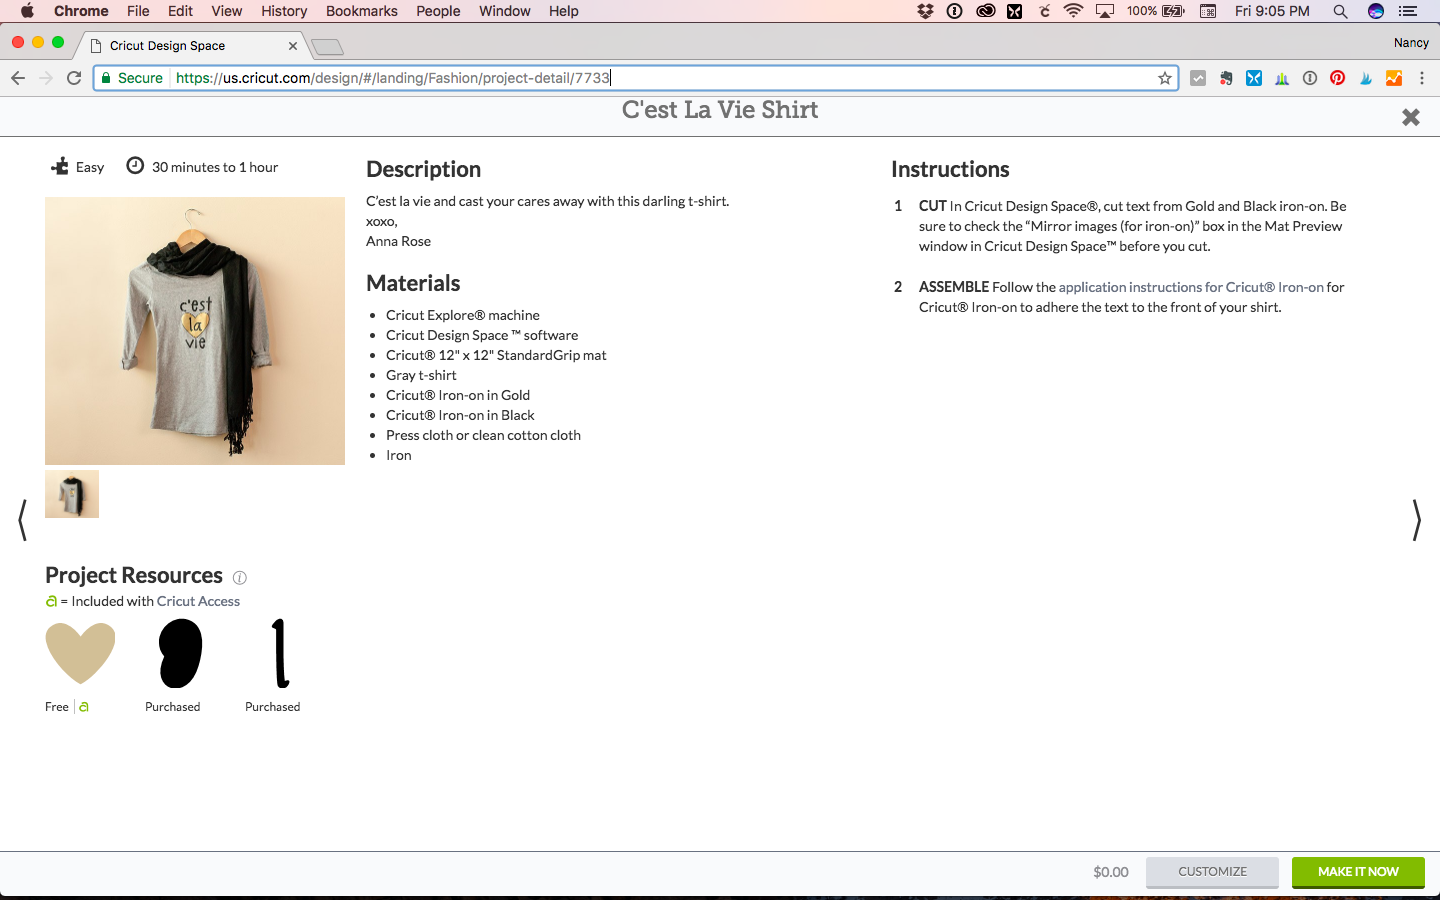
Cricut Make It Now t-shirt project
Remember, just because you are using a Make It Now project, doesn't mean that you have to make it look exactly like the Cricut sample! Changing the color scheme is as simple as feeding different colors of material into the machine. Cricut Design Space does allow you to edit a Make It Now project - or any other one - to change the colors of elements. But on a simple two color project like this one, it's not worth taking the time to make the change in the software. Just feed the colors you want into the machine when it's time for each cut!
For making my t-shirt this time, I chose to make the design with white lite iron-on and pink glitter iron-on. My 13 year old daughter, who the shirt was for, is all about the pink glitter.
Cricut iron-on cutting
The Smart Set dial on the Cricut Explore Air 2 machine makes it easy to set the machine to cut Cricut Iron-On material. Just spin the dial to "Iron-on" to set it and you're done!
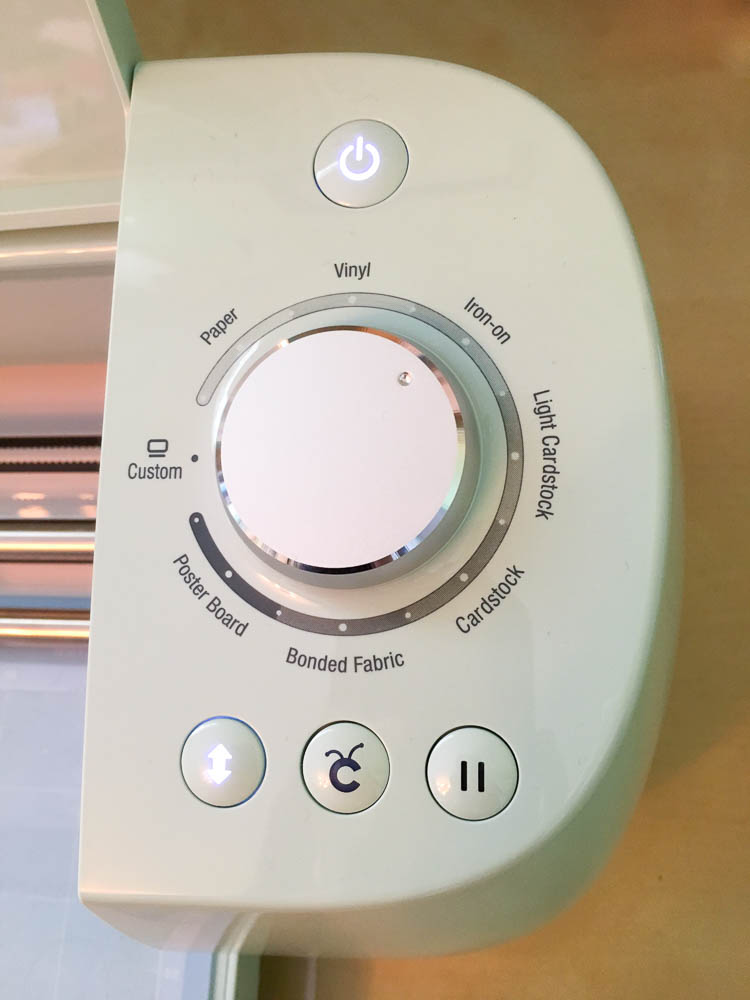
Cricut Explore Air 2 Smart Set Dial
The other key to cutting iron-on material is that you have to cut your images in reverse. There is a handy checkbox alongside each layer of your design in the first cut window that you can check to have Design Space reverse the design for you. If you proceed to the final cut window with your machine set on "Iron-on", but have forgotten to check the "mirror" box for your layers, the machine will yell at you with a bar that pops up to remind you!
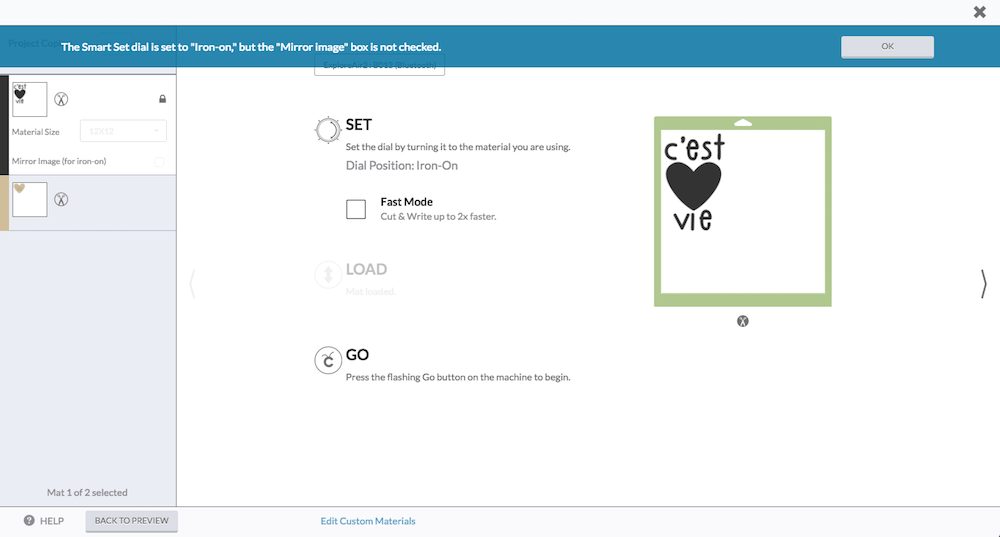
Cricut Iron On Warning
When your material comes out of the machine, and your design has been cut in reverse, it will look something like this. The plastic is underneath it on the mat, and then becomes the transfer tape to carry your design to the item you want to iron it on.
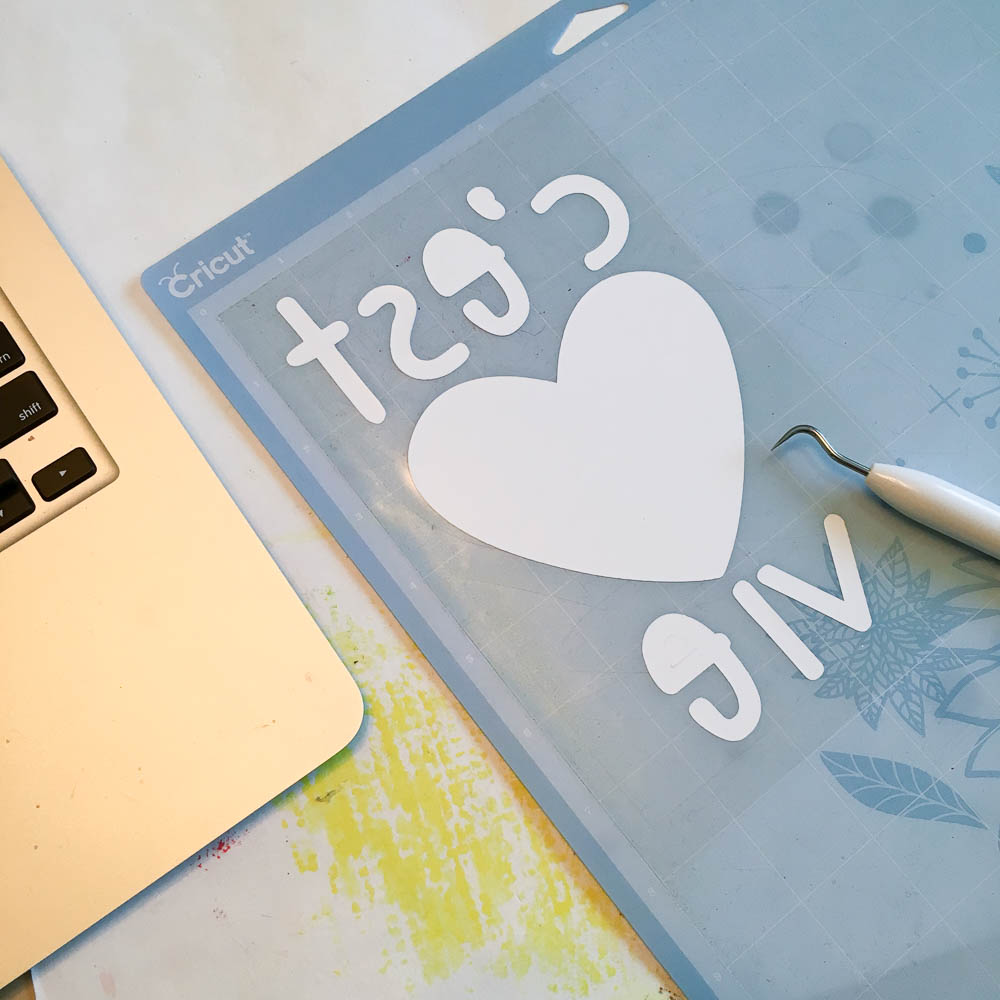
Cricut iron-on
The weeding tool makes it 100x easier to weed (remove the waste from) designs cut from iron-on material. Just use the hook part to stab a piece that you want to remove, and then pull to remove it.

Cricut iron-on weeding
To iron on your material and get good results, it's important to pay close attention to the package instructions. Before your begin, make sure to pre-wash your item (and don't use fabric softener) so that your iron-on will stick well.
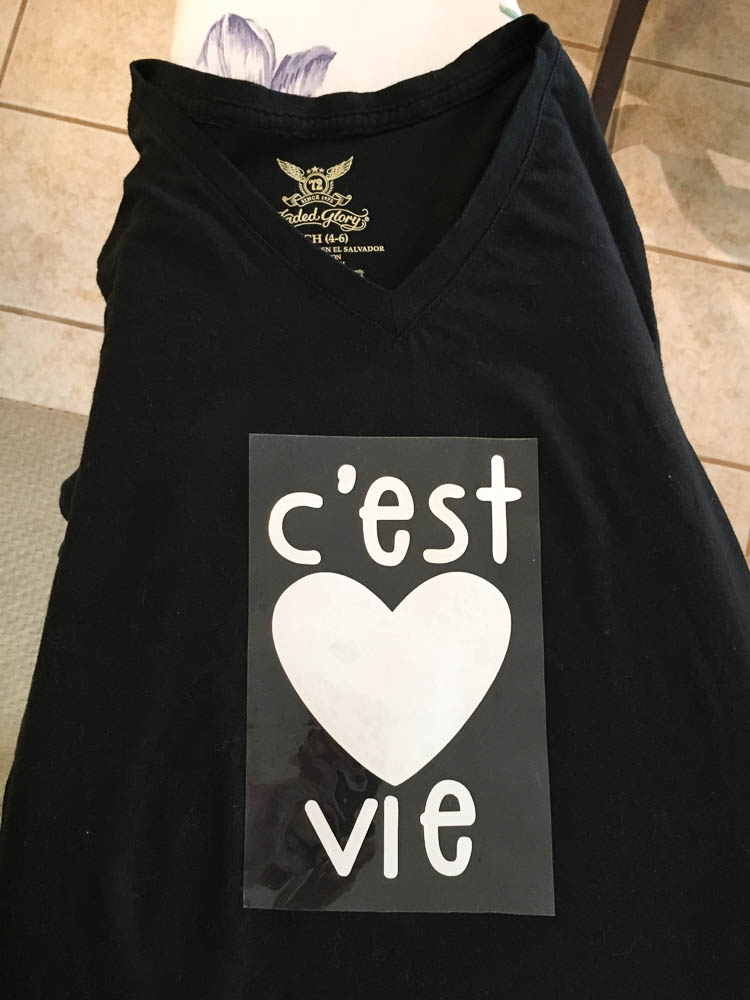
Cricut iron-on t-shirt
It only took a few minutes to cut my Cricut Make It Now design and iron it on, but the results were gorgeous! My fashionista was very happy with the results and the new addition to her wardrobe!
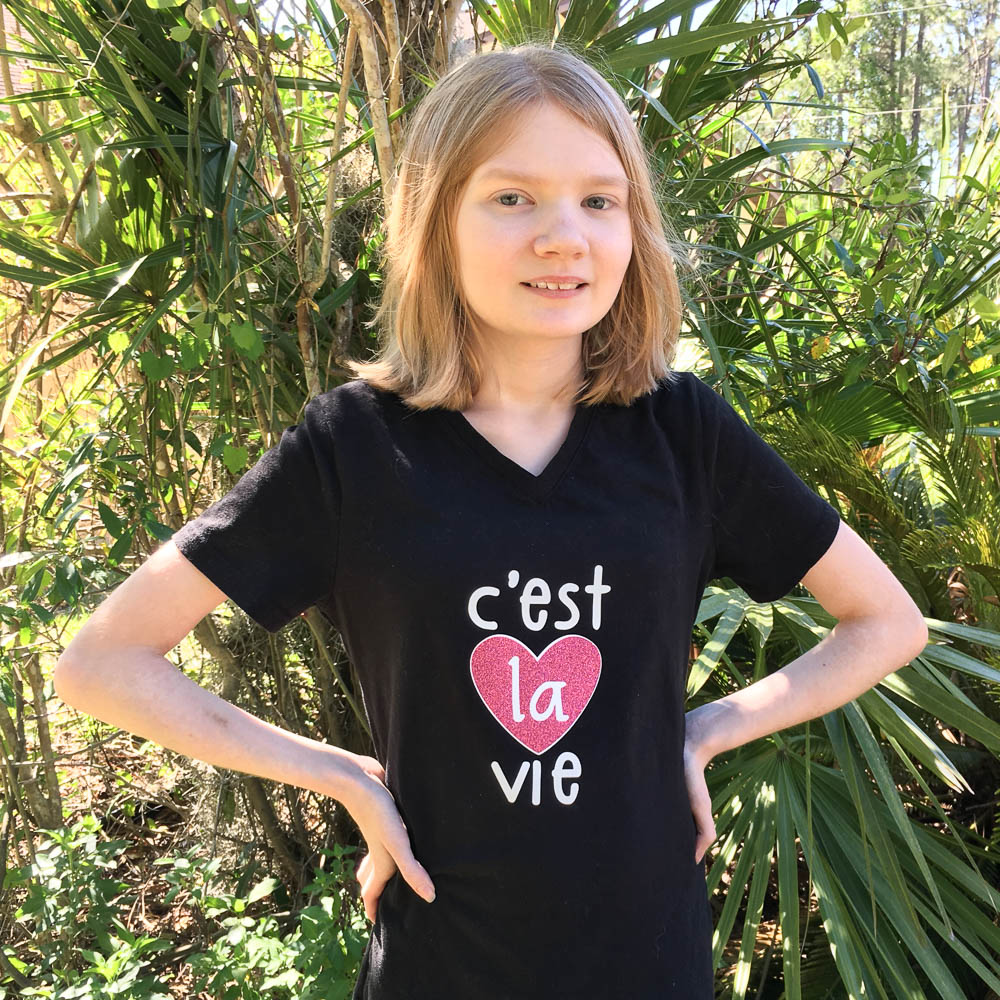
Cricut iron-on t-shirt on model
Tips for Using Iron-On Material:
Iron-on material goes plastic side down on your cutting mat
Don't forget to check the "mirror" boxes when cutting
Items being ironed on should be 100% cotton if possible and pre-washed with no fabric softener before ironing designs on
Make sure to turn the steam off on your iron
Use a nice firm ironing surface
This is a sponsored conversation written by me on behalf of Cricut. The opinions and text are all mine.