
How To Store & Organize Your Photo Prints
Welcome back to Scrapbook Update's Photo Organizing Series! Today, we're going to show you how to take a simple and orderly approach to organizing and preserving your photos.

How To Organize Your Photos
[Disclosure: I am a member of the Amazon affiliate program. Some of the links in this article are Amazon affiliate links that pay this site a commission at no cost to the reader when a purchase is made after a click.]
Let's get started!
Step #1: Gather All Of Your Photos
The first step is pretty straightforward. To organize your photos, you need to locate all of them and gather them all together in one place.

5 Reason to Organize Your Photos
Think you have done a pretty good job at this task already? Take a hard look around your house to be sure. As a long-time photography enthusiast and scrapbooker, I was pretty proud of how organized my photos were in about 20 cardboard photo boxes. And then I started digging them out of the closet to do this reorganization...and what I discovered shocked me. I found something like four boxes of photos (some of which you can see above) that were a complete jumble! I found a stash of enlargements and digital photo prints that I had forgotten I had. I also found some photos stashed in a box with unfinished scrapbook projects. Dig deep to find all those wayward memories!
At this point, just gather them into whatever containers are handy...shoeboxes, extra plastic boxes you have laying around. Later you can find your photos a permanent home.
Step #2: Sort Your Photos Chronologically
Next up, start sorting your photos chronologically. If you have a lot of photos that aren't in any sort of order, you might want to start by sorting them into large categories (by decade, or by places lived, or periods of your life) and then start organizing within those segments into years, and then months.

Organizing Photos
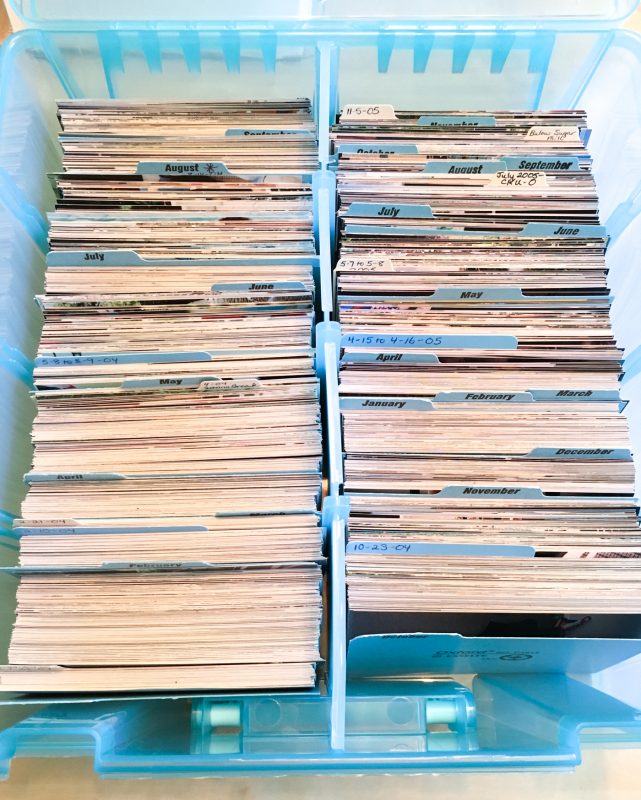
To make it easier to locate your photos in the chronological file, I recommend using 4x6 card dividers. I have some marked by month and also use blank ones to mark events for which I have a lot of photos (like vacations). Use whatever divisions work for you!
If, like most of us, you haven't been entirely diligent about labeling your photos in some way with dates, you might have a lot of them that you don't know for sure when they were taken. I suggest setting those aside until you are done putting all of the ones that you can identify for sure. Then, you can begin to identify the unknown photos using your already identified photos for help.
Here's a few other tips for ways to help identify at least the year a photo was taken:
Coupons: If your photo is still in the processing envelope, look for coupons or offers on it that have an expiration date.
Clothing: Match a distinctive clothing item to other photos to determine the period that it was taken.
Children: The age of children, especially young ones, can be a big hint to when a photo was taken. (The presence of a spouse or loved ones who are now deceased in a photo can also help date it.)
Home: The setting of a photo can provide a time period limited to when your or your loved one lived in that location.
Decor: Look closely at the backgrounds of photos. A paint color, piece of furniture, or even a holiday gift that you remember being from a certain year can date a photo. (Cars can help too!)
Windows: If there's a window in the background, peek outside. What season is it?
Figuring out a date for photos without them is like a big detective game. Take your time and hunt down the clues! Not every mystery can be solved, but you might be surprised how many you can figure out!
Step #3: Purge Your Photos
Now that you have all of your photos in one place and organized, you should have all your photos taken at the same time and place together. The next step is the hardest...it's time to purge!
You're probably thinking, "wait, did she just suggest I throw away photos?" Why yes, yes, I did! Now, take a few deep breaths and hear me out. I'm an absolute photo hoarder, and if I can do it...you can!
Start going through your photos, starting with the oldest. Ask yourself if you really need three copies of that terrible family picture from Christmas where 2 of the kids had their eyes closed? Or the three blurry pictures before you got the exposure right of the tree in the dark? Throw them out, keep the good ones, and move on to the next batch! Be brutal. Be honest with the answer when you ask yourself if you will ever have a need or desire to see that picture again.
Step #4: Label Your Photos
Once you've decided what photos you are going to keep, it's time to do some of the most tedious work. In case your photos get separated from their nicely organized files, each individual photo should be marked with a date and other important info that may not be obvious from the photo. (Names would be nice for future generations, too!) This sounds like a big task if you have a lot of photos, but you'll probably be surprised how quickly it goes.
To write on my photos without damaging them, I use an archival safe Sakura Identi-Pen. The fine point end is perfect for marking on the backs of photos. I've used them for years and love them!
Step #5: Organize Your Photos In Containers
Now that you know how many photos you need to store, you can decide how to store them! For years, I stored my photos in about two dozen paperboard photo storage boxes on a shelf in my studio. These boxes are easily and affordably available at local craft chain stores.
But a big reason I started this photo organizing project was that I wanted to get my photos stored in something more sturdy, more protective, and easier to move. As I mentioned in the previous installment on organizing negatives, the recent spate of hurricane disasters here in Florida has me thinking about being able to better protect items that are precious to me. I decided I wanted something easier to move if we decide to evacuate, and that offers at least some protection against water infiltration in the house (especially a leaky roof).
Artbin Super Satchel Double Deep
I settled on using Artbin Super Satchel Double Deep containers. These plastic boxes hold two rows of photos, and have a lid that latches shut. They come in a variety of colors, and retail for between $25-$30 each on Amazon, depending on the color.

Storage Cubes for photo boxes
I store my Super Satchels in cubes in my craft studio. The photo boxes are arranged in chronological order from bottom to top. The cubes I'm using are really old, discontinued ones from Cropper Hopper but Artbin actually makes storage cubes that you can do the same thing with.
Step #6: Storing Large Photos
All of the steps above are great for your 4x6 photos. But most of us have other - bigger - photos lying around too. I found a huge stash of 5x7 photos while I was organizing. Some were enlargements I'd had made to scrapbook. Others were Disney Photo Pass prints, or prints from family weddings or other special events.
I also had a bunch of photos that were too small to put safely in my 4x6 photo file, mostly 3x4 prints I had made for scrapbooking. I needed some way to organize all of these photos!
Organizing Photos
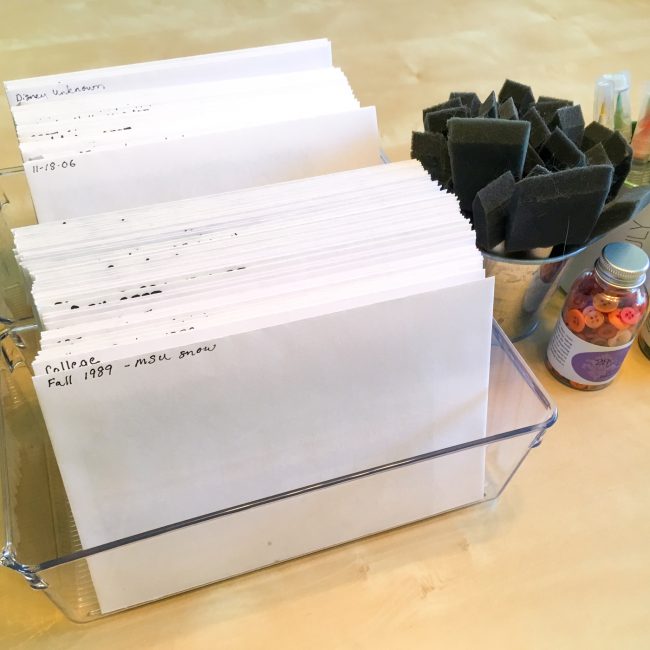
Because I like to put things in bins and folders, I decided to put each event in its own envelope. (I used these peel & seal envelopes because they won't get sticky in the Florida humidity like a lickable envelope.) Then I filed them chronologically in two Linus Pullz Medium Bins (I use those bins for everything in my studio!) and the bins live on the end of my craft table for easy access while I'm scrapbooking.

Photo Storage Boxes
And finally - did you notice those thin boxes stacked on top of each of my cubes of photo boxes? Those are Artbin Super Satchel Slim boxes, and they are the perfect size for holding portraits up to 11x14. This means they can hold all of those precious large sized portraits, like school pictures, that we all have laying around!
Now that we've taken care of our old print photos, next up is organizing our digital photos! Check back tomorrow for the next installment in the Scrapbook Update Photo Organizing Series! (And if you haven't yet, check out 5 Reasons To Organize Your Photos and Organizing Your Negatives.