
Mother's Day with Tim Holtz Distress Color of the Month!
Mother's Day is coming! Greeting card industry statistics show that it is the third most popular holiday of the year to send cards for (after Christmas and Valentine's Day). Today's project will help you get ready to send your good wishes to the special mom in your life. As a bonus, I got to play with some of the latest Tim Holtz products from Ranger, Stamper's Anonymous and Tim Holtz idea-ology along the way - including all three of the Distress Color of the Month products to hit shelves so far in 2015!
[Disclaimer: Some Ranger products used in this project were received as promotional samples. This site is a participant in the Amazon.com affiliate program. Some links in this article are affiliate links that pay this site a commission when a purchase is made after a click.]
I started with Ranger's 4.25 by 5.5-Inch Watercolor Cardstock, with about one half inch cut off of the top and side. My first element for the card was stamping with Tim's new Flower Garden stamp set from Stamper's Anonymous. As soon as I saw that set in the CHA preview I knew I'd be buying it! The beautiful flowers are perfect for so many projects.
It was important to use Archival Ink for stamping the flower and stem because the image needed to be water safe for the steps that happen later.
The next step was to color in the flower with the new Abandoned Coral Distress Marker - the February 2015 Distress Color of the Month! I put pigment in each area of the flower but didn't go to the edges of the areas, leaving a white border. I did the same thing with the Cracked Pistachio Distress Marker (the January 2015 Distress Color of the Month) for the flower stem.

stamped image to watercolor
With the pigment in place, I grabbed my Fine Detailer Ranger Waterbrush and began spreading it to the edges of each area of the flower. The water diluted it, and let it spread, until it looked like this:
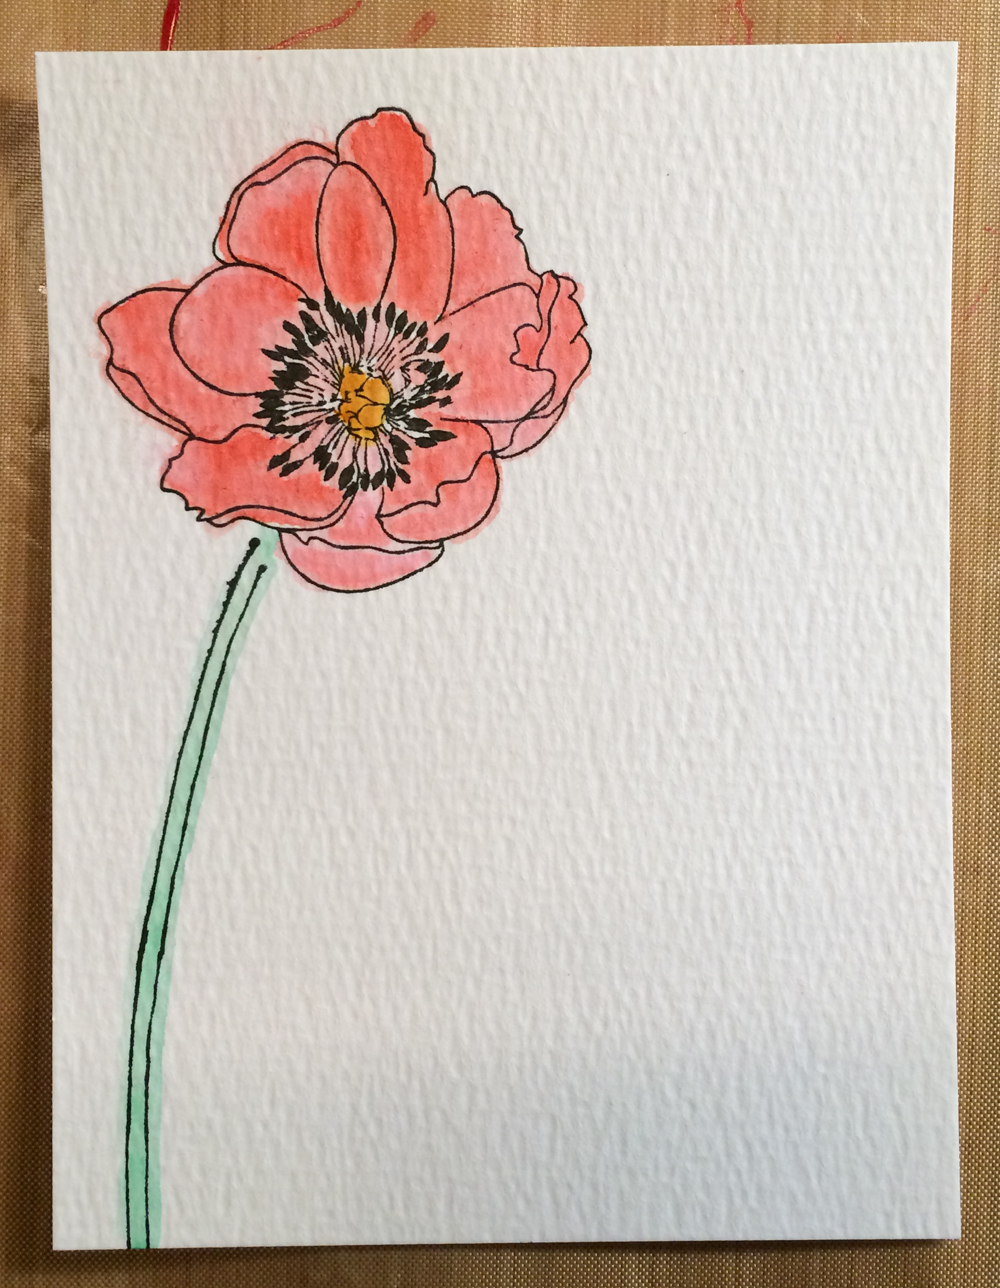
finished flower
(Instructions on completing the black and yellow elements will appear below.)
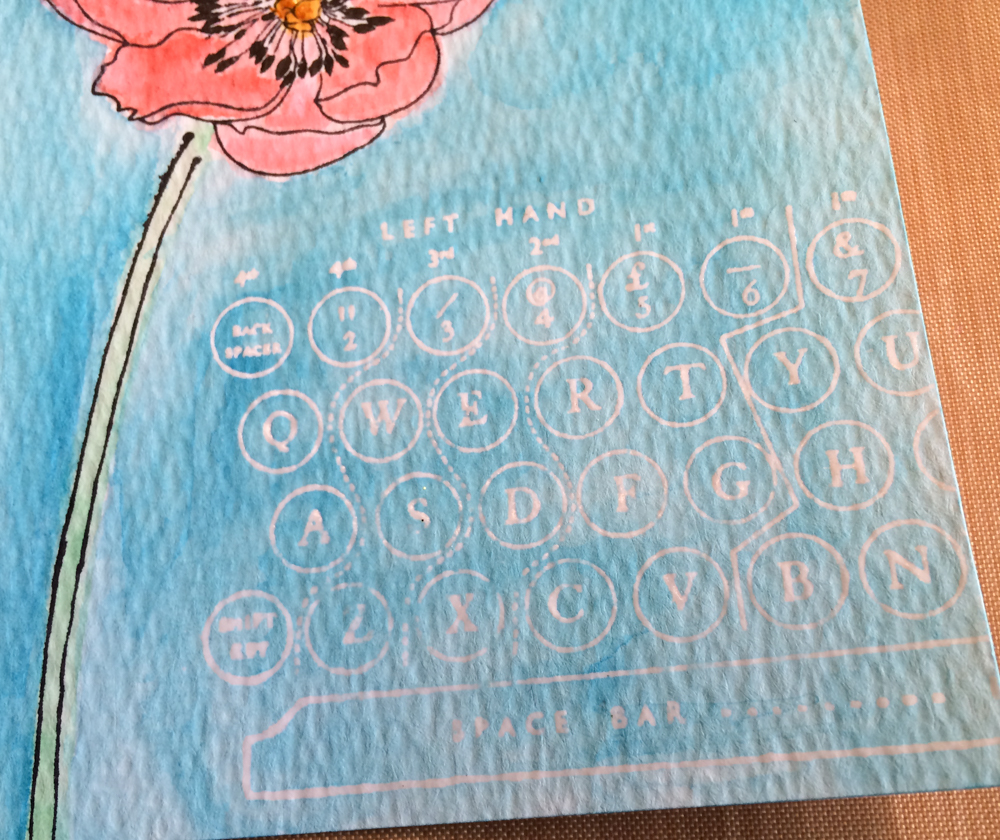
The placement of the stamped image left a huge white space on the card front that I felt needed filling. So I went for another one of Tim's new stamp sets, the Documented set. I stamped the typewriter key image from the set in clear embossing ink, extending off of the right side of the card, and then heat embossed it with clear embossing powder.
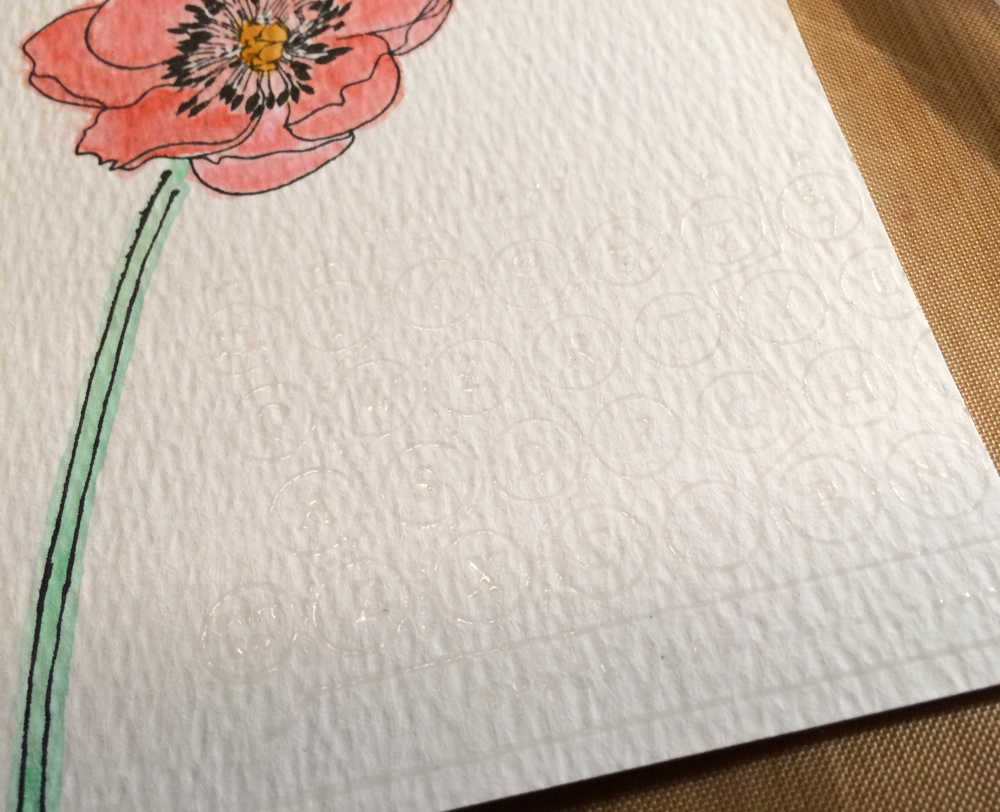
clear embossing for resist
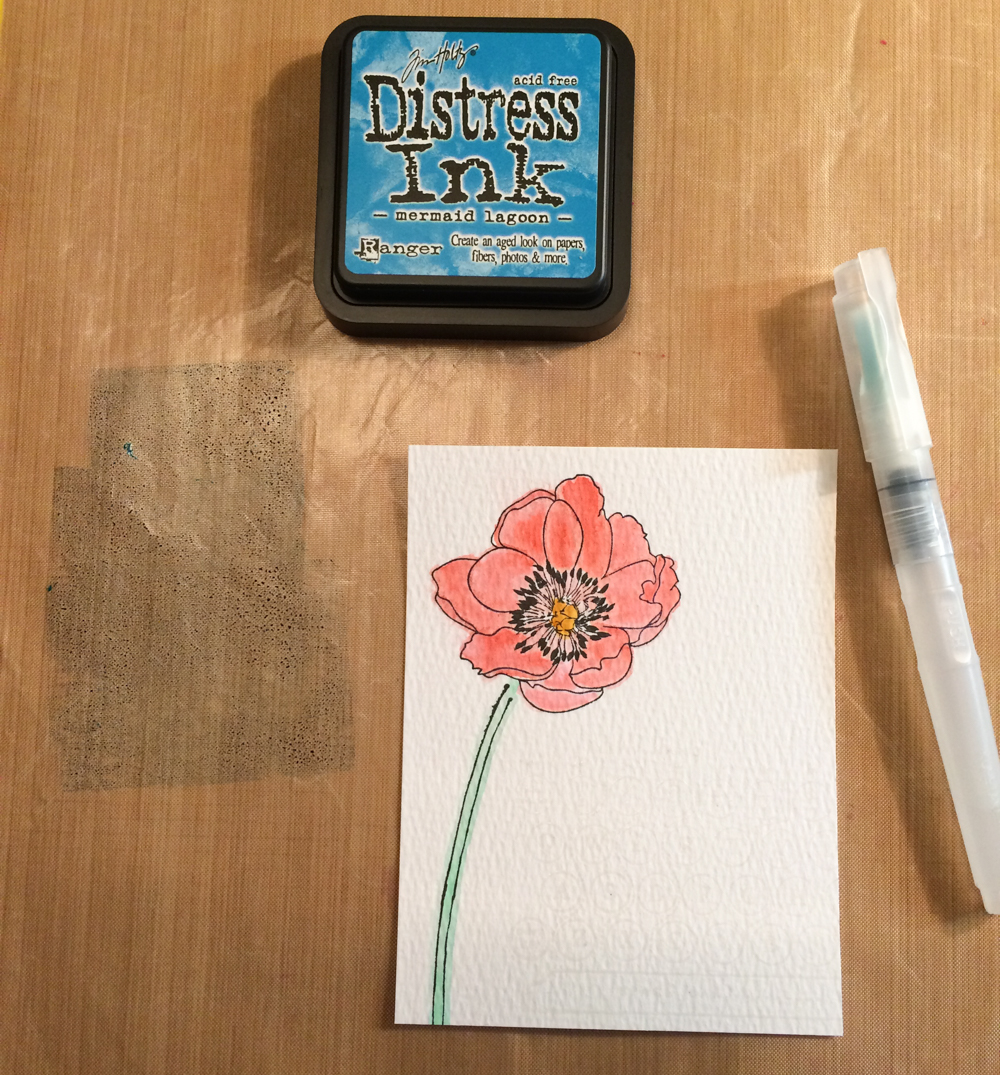
The clear embossed image could now serve as a resist to be painted over! I wanted to create a background with the same watercolor effect as the flower, but getting an area that big filled in with pens would be a challenge. So I grabbed my Mermaid Lagoon Distress Ink pad (the March 2015 Distress Color of the Month) and tapped the surface several times on my craft mat, leaving a pool of ink behind.
watercolor with Distress
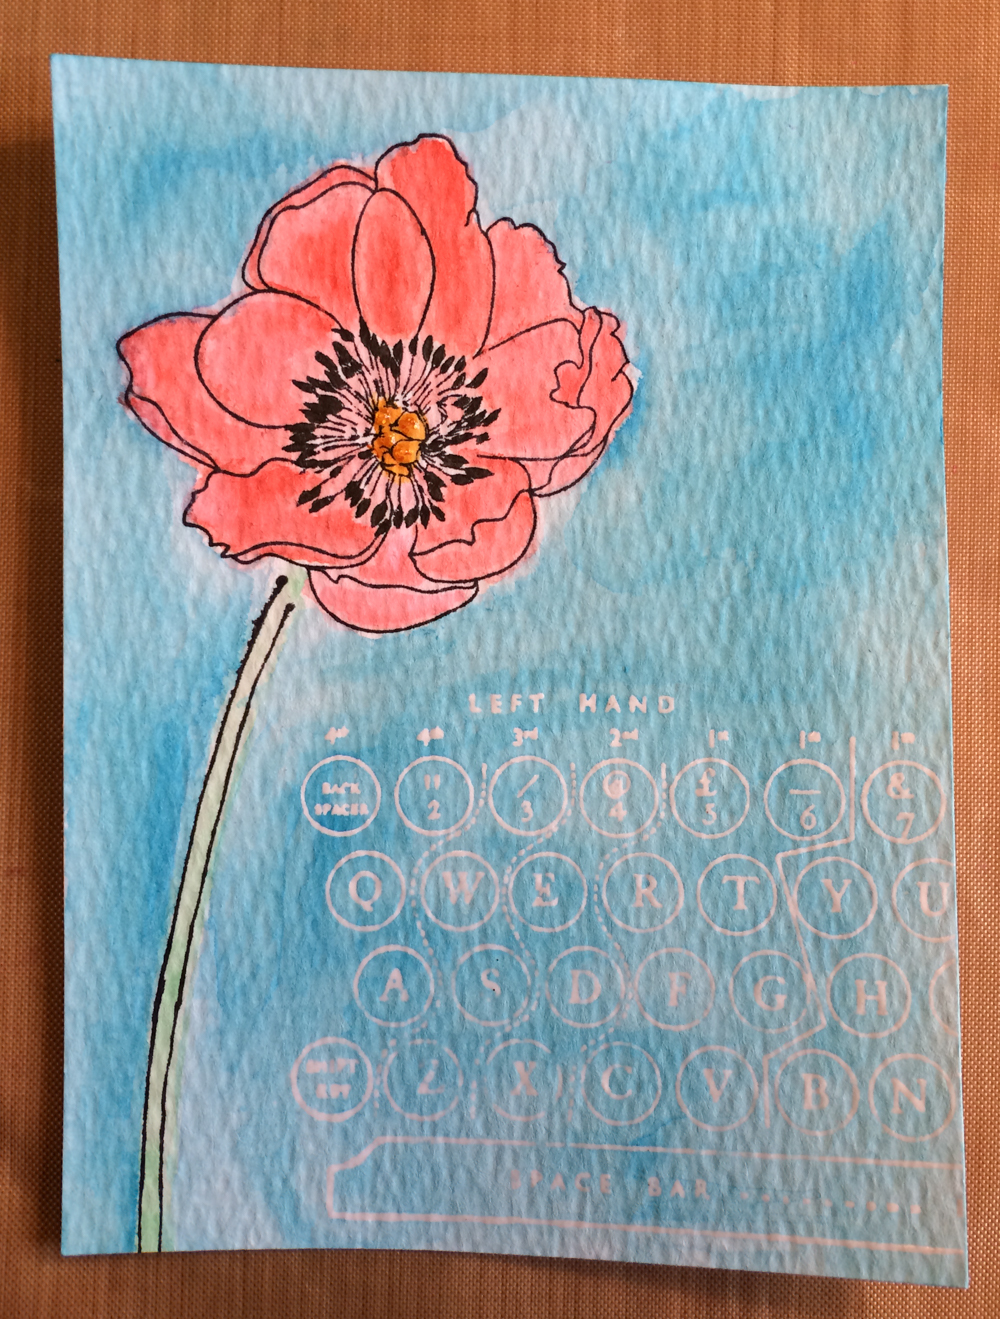
Then I used my Broad Brush Ranger Waterbrush to pick up the ink a bit at a time and paint it onto the card's background - including over the embossed image. When I was done, I had a watercolored background with a resist image showing through.
watercolor resist
A closer look at the flower area of the image shows some of my favorite details of the card - and why I love this watercolor technique so much. You can see that I didn't get the color precise on my flower edges, and the colors mixed together a bit in places along the edge. But with this technique, the color mixing provides a shadow that creates depth, and the imprecision adds to the watery feel.
In the flower's center, I put tiny dots of Spiced Marmalade Distress Marker and then used the Fine Detail Ranger Waterbrush to spread them. Once that was dry, I added tiny dots of Wild Honey Ranger Tim Holtz Distress Stickles glitter glue on top to add some texture and shine to the center.
The stamens of the flower were colored in with a Black Soot Distress Marker, and left as they were colored - the only thing that I didn't take a waterbrush to on this card. That helped keep them nice and sharp and bold.
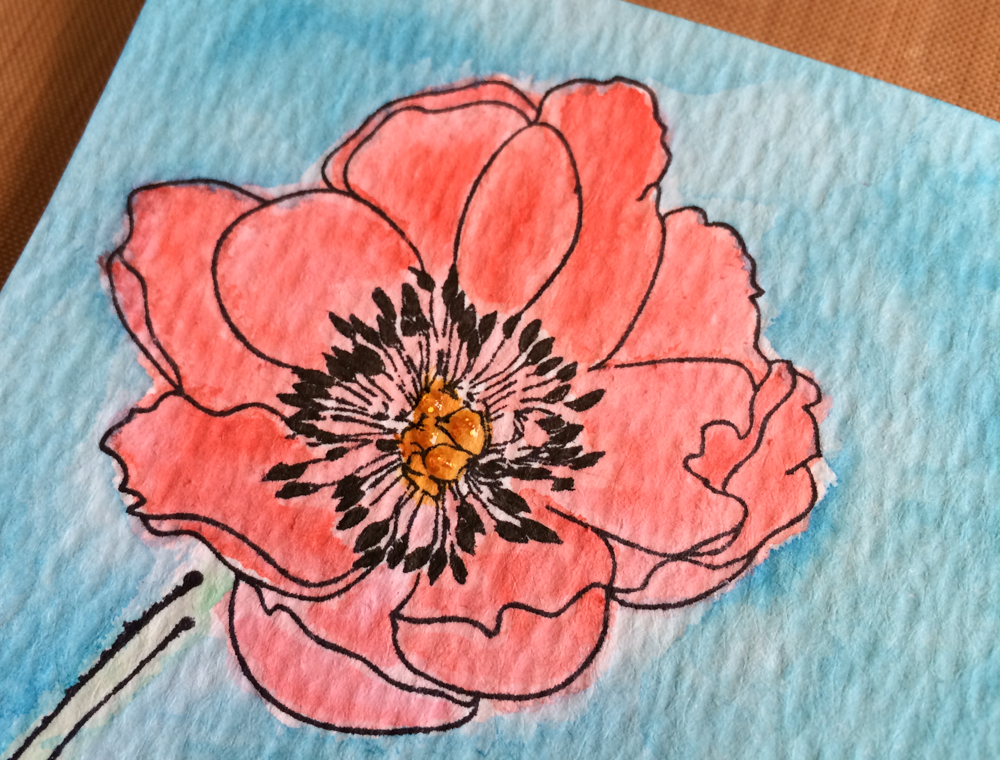
watercolor flower close up
The embossed image showed up nicely after being watercolored over:
resist close up

My next step was to back the watercolor paper with a piece of text patterned paper from the 6x6 section Tim's Wallflower paper pad. Before I did, I edged the watercolor paper with Antique Linen Distress Ink, and the patterned paper with Frayed Burlap Distress Ink.
After all of this, the card needed a sentiment still! The sentiment stamp came from a Hero Arts stamp set, and was stamped on piece of paper from the 3x3 block section of the Wallflower paper pad. I layered some tissue tape under it, and also inked it with Frayed Burlap before sticking it down.

card sentiment
Once all of that brown was added with the sentiment and border, I felt the huge expanse of blue was a bit too much bright contrast. Knocking it back a bit was easy, though, thanks to the blending qualities of Distress Ink. I just got out my Ranger Inkssentials Ink Blending Tool and my Antique Linen Distress Ink and blended some ink on random areas of the blue. It took the glaring shine off of the blue and toned it down enough to bring the card elements together.
After mounting the card onto a card base made from Bazzill Smooth cardstock, here is the final result:

Mother's Day card by Nancy Nally @ Scrapbook Update using Tim Holtz products.
Supplies:
Tim Holtz for Stamper's Anonymous stamp sets (Flower Garden, Documented)
Ranger Watercolor Cardstock (4.25 by 5.5-Inch, 20-Pack)
Ranger Archival Ink (Jet Black)
Ranger Tim Holtz Distress Markers (Cracked Pistachio, Abandoned Coral, Black Soot, Spiced Marmalade)
Ranger Tim Holtz Distress Ink Pad (Mermaid Lagoon, Antique Linen, Frayed Burlap)
Ranger Tim Holtz Distress Embossing Ink Pad (mini)
Ranger Super Fine Detail Embossing Powder (Clear)
Ranger Distress Stickles (Wild Honey)
Tim Holtz idea-ology Paper Stash (Wallflower)
Tim Holtz idea-ology Tissue Tape (Nostalgic)
Hero Arts stamp set (Celebrate Everyday)
Bazzill smooth cardstock (Walnut Cream)
Ranger Waterbrushes (Fine Detailer, Broad Brush)
Obviously, I'm really loving these new brighter Distress Ink colors in 2015! What do you think of them?