
In Depth | Tim Holtz Distress Markers
[Disclosure: Some links in this article are affiliate links that pay this site a commission when a purchase is made after a click.]
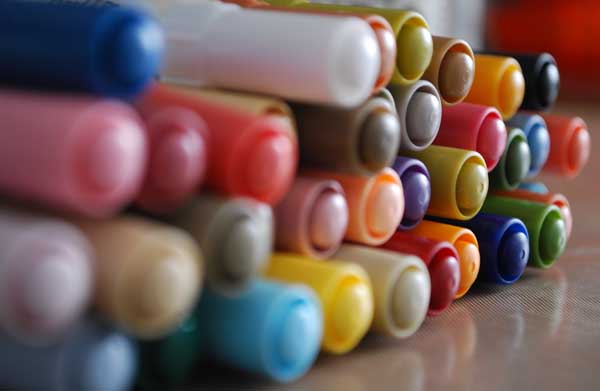
Tim Holtz has finally brought his Distress line to pen form in 37 glorious colors. Distress Markers are a product I've long dreamed of, but assumed they hadn't been able to formulate it to work. The exciting part is that I don't have to wait long - the pens are now beginning to ship to retailers, and will soon be available at local stores as well as online. Today, I will be taking an in-depth look at these pens, and at various ways to utilize them.
At first glance Distress Markers appear to be just your standard pen. They have a brush tip on one end, and a fine detail point on the other. This is my preferred tip selection for dual-tip pens as it allows me to do larger areas and color stamps easily, as well as to write or do small areas. What makes these Distress pens stand out is that they behave exactly as Tim's Distress ink pads and stains do. They blend with each other, are reactive with water, and can be used in any of the same ways or with the same techniques that you would use with the existing Distress line. This is really great because it means users don't have to learn a whole new set of techniques.
We already brought you a video from CHA Winter 2012 of Tim Holtz demonstrating the pens, that can be viewed here. In that video, Tim talks a lot about having a water brush and using that with these markers. I look forward to trying that technique, which sounds fabulous. For this article, though, I wanted to see what else we could do with these pens without the help of a water brush.
(stamp pictured above: Tim Holtz Mixed Media)
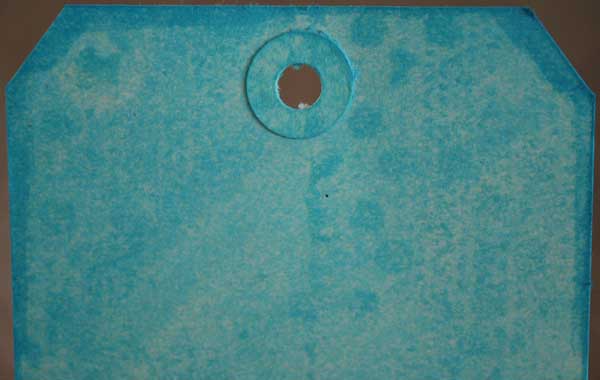
Above you can see a tag that was coated with Distress Stain, stamped some dots with Distress Ink, edged with Distress Marker, and then squirted with water. You can see that although I used the same color, the stain is slightly lighter than the ink, which is also slightly different in color from the pen. It's very subtle, and I really like that because it means you can create a watermark-like effect by layering various forms of Distress. (I did a tag tutorial on my blog showing the stains plus the inks in the same color a few months ago that you can see here, if you'd like to see more about that.)
So are Distress Markers a product you should be running out to buy? It really depends on a few things. If you like the Distress line, if you would use the blendable properties of the pens, and if a smaller, more controllable form of Distress ink appeals to you, then Distress Markers are an absolute must. However, if the kinds of things that can be done with them such as blending, writing and stamping don't appeal to you - then no, I wouldn't recommend them to you.

(stamp pictured above: Tim Holtz Compass)
Above you can see a series of experiments I did with a compass stamp and several colors of the pens. I found that starting with the lightest color, then adding spots of darker colors was the best way to work for me. Adding water or mist onto the image after stamping, or even doing so directly onto the stamp before stamping, as I did at the top left, can really give you a fantastic blurry image. The subtle blending and ability to really get in and color a stamp has me very excited. Here's a bird I stamped:

(stamp pictured above: Hero Arts Newsprint Bird)
As you can see there are no harsh lines where my colors blend, and in fact the colors can blend to become new colors entirely. Another great quality of these pens is that you will not contaminate them with other colors of Distress by blending. Just one swipe on a piece of paper and my pen was once again clean (if I had used a lighter color onto a darker color and could see a dark spot on the pen tip).

(stamp pictured above: Hero Arts Untitled Key)
Above is another colored image. This time I did not mist or add water to it, but you can see how the colors flow together and how detailed you could get with your images.

(stamp pictured above: Hero Arts Four Hearts)
Another option is that you stamp with a waterproof ink such as archival ink first, then color the stamped image as I have above. The left shows the stamp colored, on the right you can see what happens when I squirted it with water. Because I used Ranger Archival Ink (Staz-On would also work) the text of the stamp design did not bleed, just the Distress Marker pen. You can see that the Distress colors stay true - just another reason I really can't say enough good things about the Distress line. I'm a huge fan!

One of my favorite techniques so far is creating confetti-like dots with my Distress pens. Just draw little streaks all over your craft mat, then take paper that has been spritzed with water and press it down onto the color, repeating as desired.

You can see how this looks - and adding more water, or misting again after coloring the tag is an option to get even more of a blurred look. I used the tag on the right to create a finished tag project, all using Distress Markers on my stamps to get some great layers of color.

Below you can see two tags created with Distress Stains. The one on the left, as seen before, has stain, ink, and pen used on it.

The tag on the right uses only Distress Markers, except for the edging which was done with an ink pad.
There is one of the markers that stands apart from the rest, and that is the Picket Fence (white) pen. It is more opaque, and also works on dark colored papers beautifully.

Above, you can see how well it shows up on cardstock, and of all the white pens I've used, this is by far the best. Not only does it work well alone, but you can use it in combination with the colored pens. Just to show an example, I have used the Picket Fence pen on Kraft cardstock and then colored over it with two different Distress Marker colors just so you could see how it would look.

The Picket Fence pen I feel is great for any crafter - whether they intend on doing Distress techniques or just want a quality white pen.

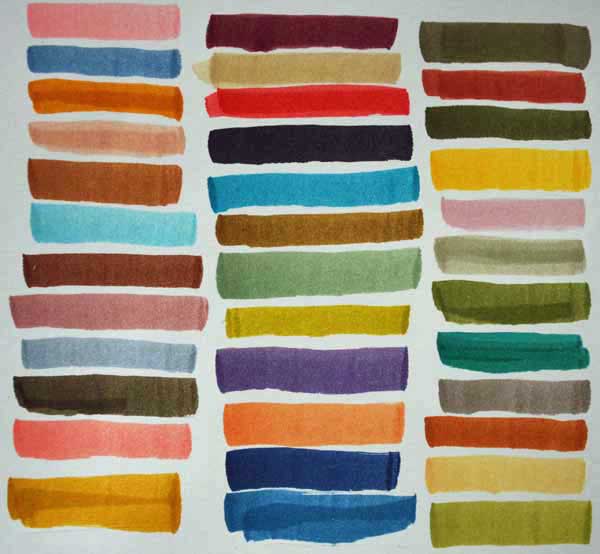
Here are my suggestions if you're deciding what colors to start with:
Pick a few colors that are your current favorites or most-used Distress Ink pad or stain colors to start out with.
Choose a few shades within a color family that would blend well together for more monochromatic looks.
Think about where and how you would use distress markers, and choose colors based on that vs the colors you find to be the prettiest.
View past projects and see where and how you've used colored pens or inks and let that guide your choices
My six personal favorite and most used Distress colors are Brushed Corduroy, Wild Honey, Tumbled Glass, Worn Lipstick, Faded Jeans, and Peeled Paint.
I can tell you that I have used and loved every color of Distress, so you really won't pick a bad color. I will also tell you that while I've been experimenting with these I keep thinking of slightly different applications and ideas, but mostly my use of these revolves around stamped images.
To end, there are a few things I will tell you that I learned while playing with these markers:
They are reactive with water so that means journalers beware. If your writing gets wet, it will bleed.
To stamp with them, you can take your time. When you are done coloring the stamp, just "huff" a breath onto the stamp to add moisture before you stamp. You will see Tim do this a lot in his demos.
Water really is the key to unlocking the potential of blending and special effects with these.
Copics are an entirely different breed of pen, almost the complete opposite of Distress Markers, so I would not try to compare the two products in any meaningful way.
I found in coloring stamps that it worked best if I first cleaned my stamp, then began coloring with my lightest color and worked to darkest color. You don't have to do this - lighter pens do work over darker colors too - but if you want the lightest shade to stand out, it works better.
The bottom line is that these bring the high quality of the Distress line to pen form. With the stains we got a bigger format, they made working with larger areas faster and easier. Now, with Ranger's Tim Holtz Distress Markers, we have a very small form available. Whether you use them to accent stamped images, create custom backgrounds, create watercolor effects, or anything else you can dream up - these pens are a great tool, and reasonably priced.
-May Flaum