
Review | Button Making Tools
Buttons are arguably one of the most popular basic embellishments in all of papercrafting, especially among scrapbookers and cardmakers. Even though buttons are commercially available in almost any color, shape, or size available, sometimes you want to be able to use your own supplies to make that perfect button as an accent for your project. There are several tools on the market designed to help you do exactly that, and we're going to give you a closer look at three of them - Epiphany Crafts' Button Studio, the Double Embossed Button Punch from Martha Stewart Crafts, and Papertrey Ink's Buttoned Up #1 Die Set.
To do this, I've tested each one in my craft studio using a variety of materials- patterned paper, coasterboard, and 100% wool felt (wool felt has less "stretch" to it than synthetic and is better for die cutting in general) - and recorded the results to help you decide which of these tools might be right for you.

Button Studio by Epiphany Crafts:
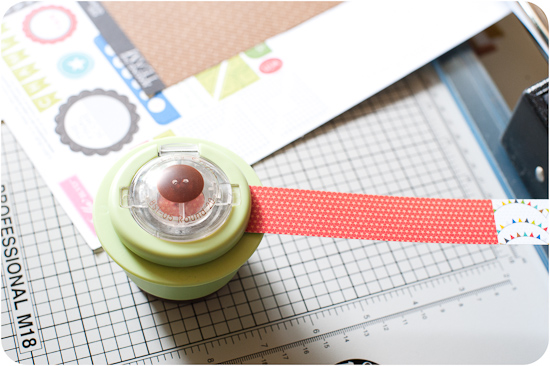
The Button Studio from Epiphany Crafts is first up on our tour of button making tools. This little gadget is a self-contained one-stop shop for punching and assembling your own customized buttons. It allows you to easily select the exact part of the patterned paper that you want to use for your button. Several models of the tool are available to produce a variety of sizes and shapes of buttons, and the similar Shape Studio line of tools from Epiphany Crafts allows you to create acrylic shapes without the button holes in the middle.
Using the Button Studio tool is quite simple. You start out with just the base and an open lid...
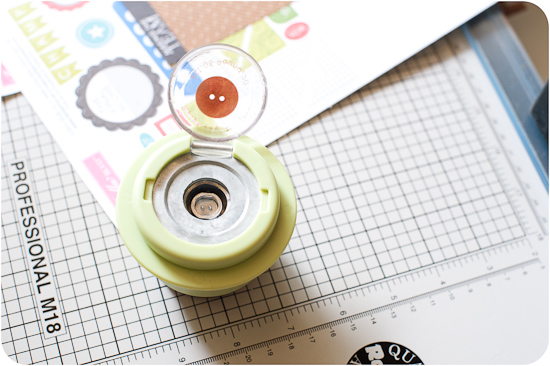
...and then slide your patterned paper in until it completely covers the punch opening and displays the portion of the pattern that you want to use on your button.
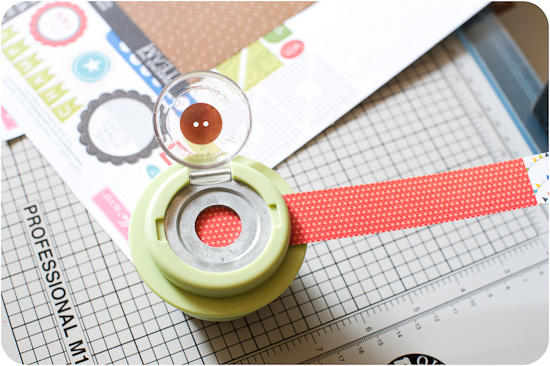
A button blank (must be purchased separately) is then placed on top of the patterned paper but is not yet "pushed down" to adhere it.
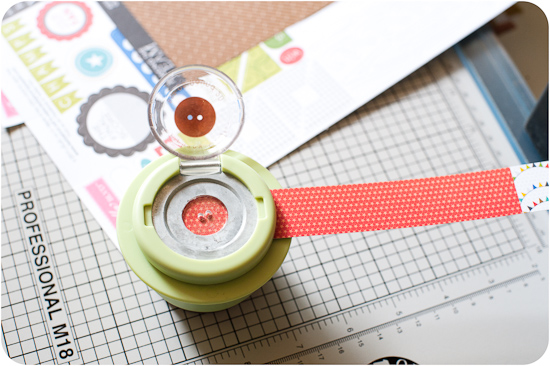
The final piece of the tool is a plastic guide that helps line up the holes in the button blank with the "holes" in the (now obscured by patterned paper) punch mechanism below - thus the reason for not adhering the button blank to the patterned paper in the step above.

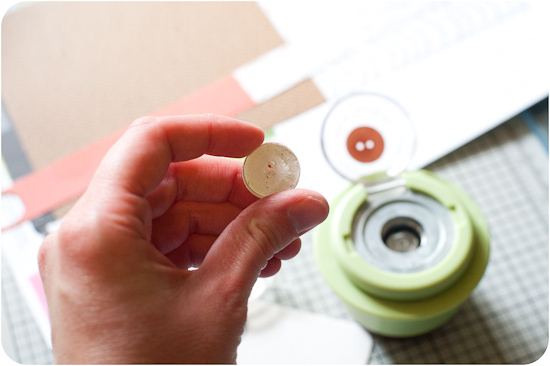
After everything is assembled, you close the lid, give the top of the mechanism a quick, firm (it requires some pressure, but not ridiculous amounts of it) press...
...and remove your completed button. I like the look of the plastic cover on top of the button, but I do need to point out that the punched paper never seems to line up perfectly with the button blank. It leaves a millimeter or so on one side hanging out from under the edge of the plastic top.

I experimented with some of the other test materials I had on hand and was able to punch through uncovered coasterboard to create a button, though one of the holes didn't punch all of the way through. Covered coasterboard wouldn't cut, and wool felt was too thick to even load into the paper slot.
Strengths
- Allows you to easily use the exact part of the patterned paper that you want shown on your button
- Produces the most realistic looking buttons of the tools reviewed due to the clear plastic blanks used to top the patterned paper
Weaknesses
- Requires the purchase of blank plastic buttons specifically made for the tool
- If you wish to make other shapes or sizes of buttons, a whole new tool and set of blanks must be purchased for each size and shape
- Loose tolerances in either the punch alignment or button blank size cause a small (1mm or less) amount of patterned paper overhang on at least one side of the button
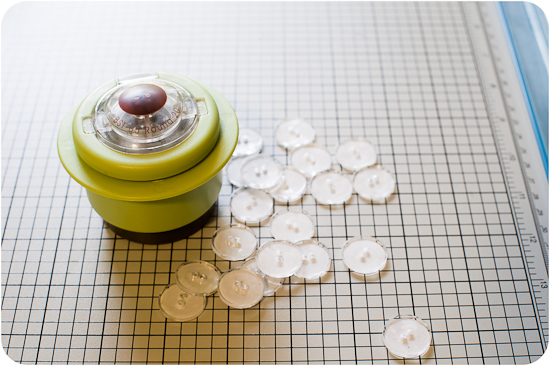
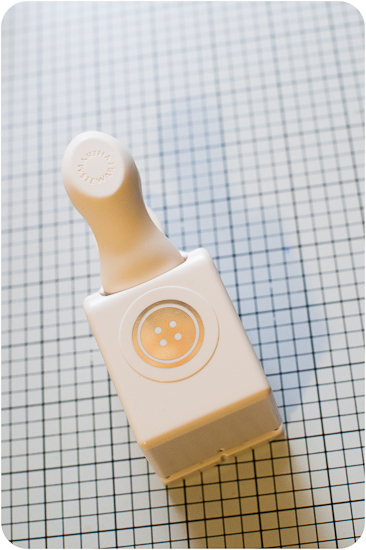
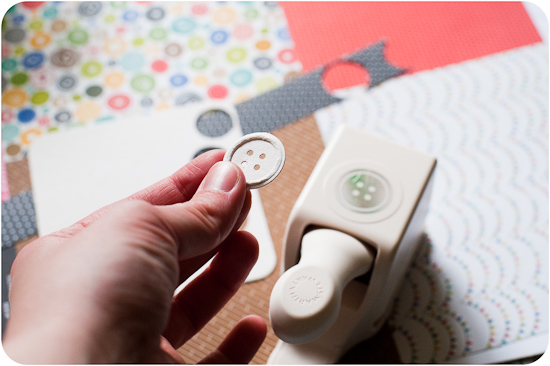
Martha Stewart Crafts Double Embossed Button Punch

The Martha Stewart Double Embossed Button Punch is definitely the simplest to use of the three tools being reviewed today.
The tool works just like any other paper punch: insert the paper you want to cut, squeeze the handle, release, and remove your completed button.
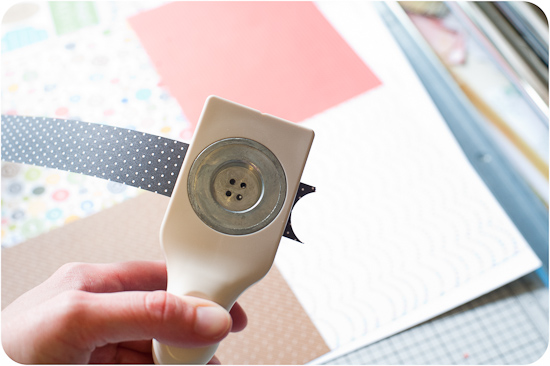
This punch adds a nice, heavy embossed edge to the cut for a more dimensional (and thus more realistic) look.

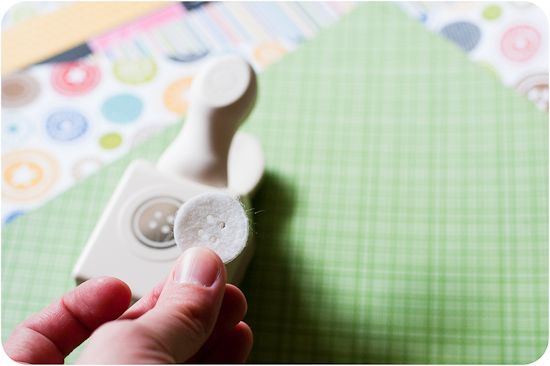
I was quite surprised to find that the punch actually cut through and embossed coasterboard, as most punches I've used in the past aren't strong enough for anything thicker than heavy cardstock. Coasterboard covered in patterned paper though was, unfortunately, a no-go with this tool.
If I was surprised that this punch cut through coasterboard, I was even more shocked to find that it cut through wool felt, as well! The felt did not emboss, as is expected since it's closer to cloth than paper and doesn't hold creases in the same way, but the cut (including the holes in the middle) was nice and clean.
Strengths:
- Does not require the use of any additional tools or supplies - all you need is the punch and the material to be punched
Weaknesses:
- Closed punch mechanism does not allow you to see exactly where on the paper you are punching
- Can only punch one size of button
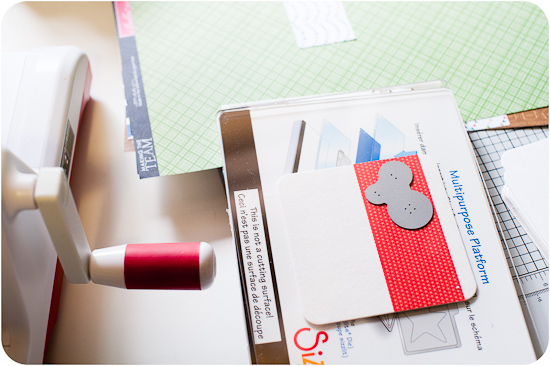
Papertrey Ink Buttoned Up #1 die set
The last stop on our tour of button making tools is Papertrey Ink's Buttoned Up #1 die set (a Buttoned Up #2 set with scalloped edges is also available). It's definitely the smallest tool on the list, if you don't take into account the fact that you also need a manual die cutter (the die is compatible with the Cuttlebug, Sizzix Big Kick/Big Shot, and many other popular die cutting tools) to use it.
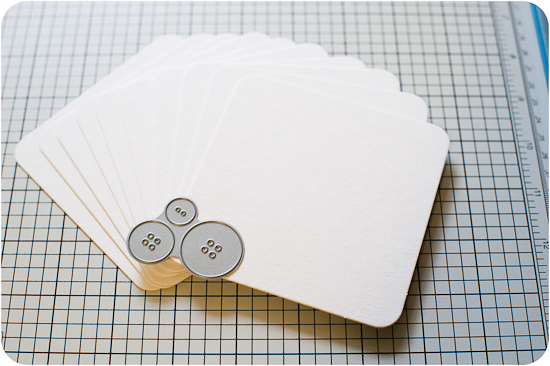
I used this die in my Sizzix Big Kick, making my cutting "sandwich" with the multi-purpose platform (using all the tabs), an acrylic cutting plate, coasterboard covered in patterned paper, the die (face-down on the coasterboard), and then finally another acrylic cutting plate covering it all.
I then ran the sandwich through my Big Kick...
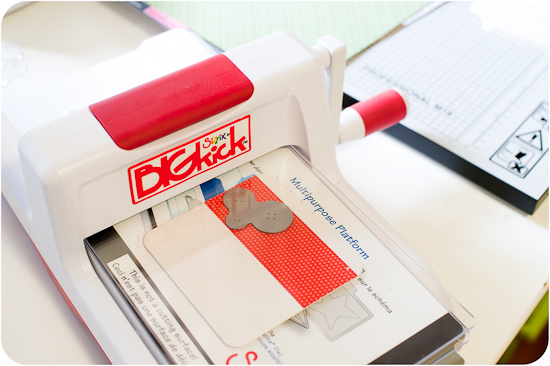
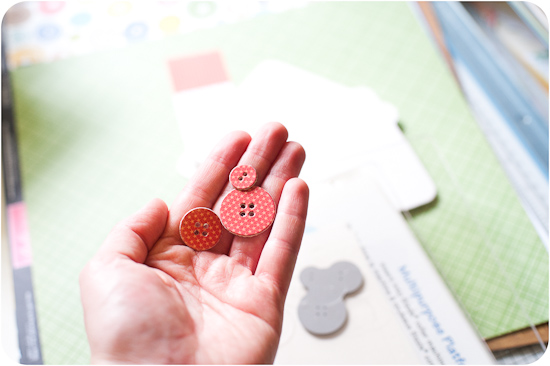
...and out came perfectly covered and shaped little buttons. The dies give a slightly rounded finish to the edges of the cuts, eliminating any layering effects from the paper that's adhered over the coasterboard. These dies can also cut plain paper and felt.
If you are into stamping and would like to make more decorative buttons, this die has a matching stamp set called "Button Boutique" from Papertrey Ink that can be used to create less plain buttons.
Strengths:
- Die can be placed over the exact portion of the patterned paper you wish to cut
- Can cut several sizes of buttons with the same tool
- Affordable - die is only $5 if you already own a die cut machine
- Matching stamp set available to create decorative effects
Weaknesses:
- Requires that you also own or have access to a manual die cutting machine that is compatible with the die
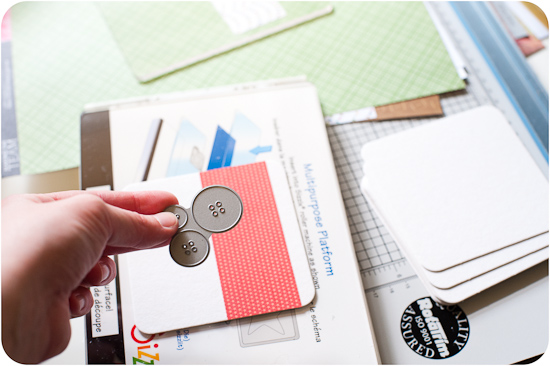
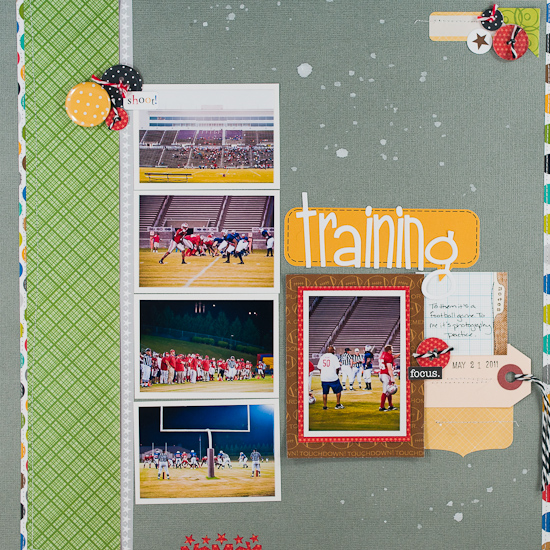
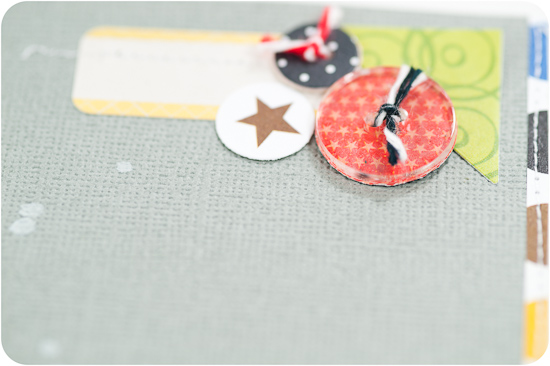
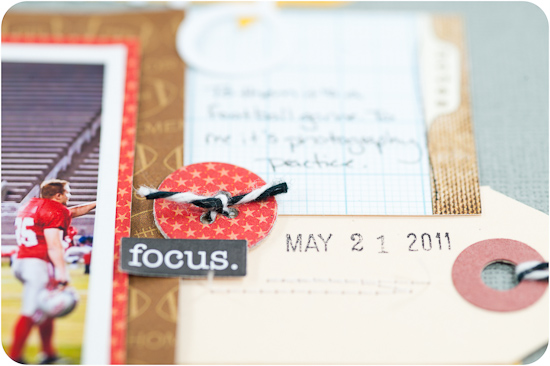
At the end of the day, all of these tools do the same thing: produce realistic-looking paper buttons that can be used on your layouts, cards, or other projects. In fact, all of the buttons styles coordinate together well when used in a single project, such as the layout below that uses examples produced by all three tools.
All of these tools are easy to use and produce attractive buttons. If you're in the market for a button making tool, take some time to think about what shapes and sizes you may need and what materials you'll want to use, then review the strengths and weaknesses of each option to help guide your choice.